
Jackson’s bespoke frames are reduce to your customized measurement for self-assembly. There are additionally ready-made frames obtainable in a collection of customary sizes. The bespoke frames are easy to assemble and take simply a few minutes. Here’s a fast visible information on learn how to assemble Jackson’s bespoke frames.

A body model with one dovetail per nook.

A body model with two dovetails per nook.

A body model with three dovetails per nook.
Assemble Jackson’s Bespoke Frames
Whenever you unpack your body there will probably be 4 lengths of moulding reduce to your required measurement, an envelope of dovetail inserts, and any mounting and hanging equipment that you simply ordered. The bars are wrapped collectively tightly in cling movie. Take away this fastidiously in order to not scratch the entrance of your body.
First, prepare your bars face up and verify that you simply ordered the fitting measurement to your art work. You’ll then flip the bars over to assemble, so you will have the desk or ground space that you’re engaged on to be clear and clean, to guard the entrance of your body. Will probably be useful in case your body is on a moveable floor like paper or card. Then you’ll be able to simply rotate it on the floor whilst you work on it, and it will possibly additionally catch any small glue spill.
Assembling Your Jackson’s Bespoke Frames
To assemble your bespoke body you have to a small hammer, a small quantity of PVA glue, a medium-sized flat brush to use it with, and a humid material to wipe the surplus glue off of your body.
Dovetails
Lay out your body items face down and lay the dovetail connectors close to every nook. Some frames include one connector per nook, some with two, and a few with three. You will have some quick and a few lengthy ones for every nook, relying on the model of the body. Discover that there’s a flat finish and a pointed finish to every dovetail.

Face down, able to assemble.

Relying on the kind of body, it could include one, two, or three dovetails in every nook.

Ensure you are utilizing the fitting size for the corresponding gap.

Discover there’s a flat and a pointed finish on the dovetails.
Glue and Dovetails
Brush PVA onto the dealing with mitred corners of the body. Put the nook collectively in order that the cut-out grooves align to type a gap, checking that the skin edges meet up completely on the nook. Holding the nook collectively steadily and really tightly, insert the dovetail piece, pointed finish first, into the opening and push it so far as you’ll be able to together with your fingers. Then, nonetheless clamping the nook together with your hand, gently faucet within the dovetail with the small hammer till it’s flush with the again of the body. In case you are utilizing a big hammer, be very mild, it doesn’t take a lot power and also you don’t wish to dent the wooden.

Brush on PVA glue

Insert the dovetail into the opening within the matched up nook.

Push the dovetail in together with your finger.

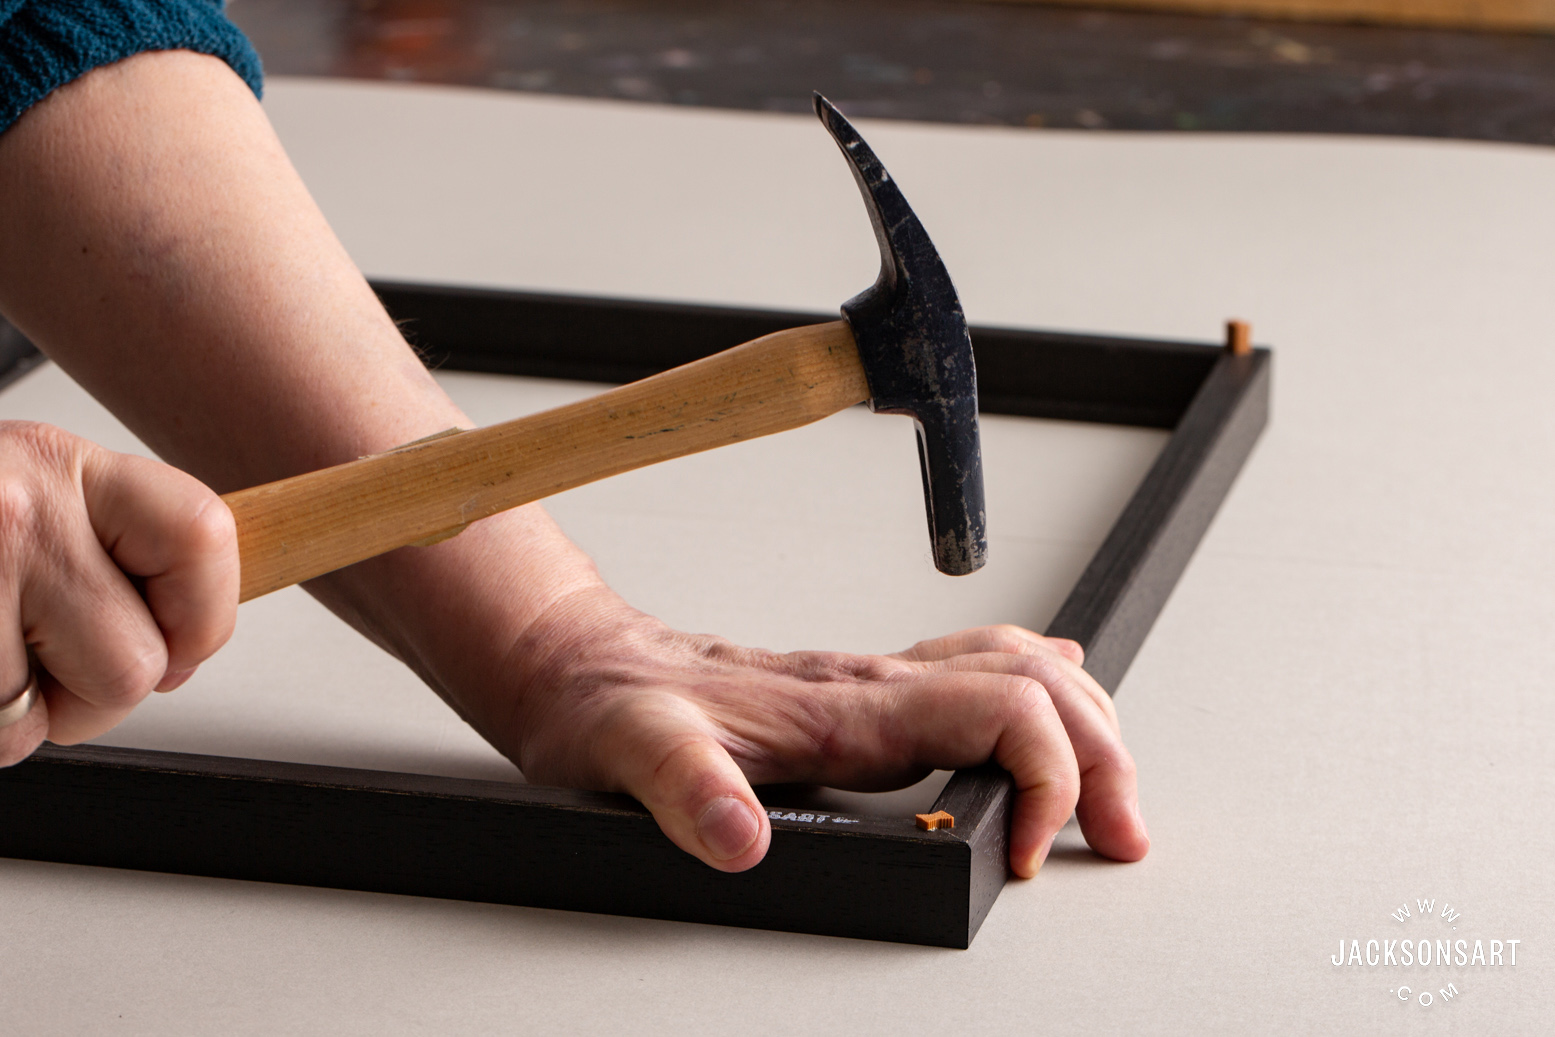
Holding the nook securely, gently faucet the dovetail in.

Till it’s flush with the again.

You should definitely maintain the nook clamped tightly together with your fingers if you are tapping in every dovetail joiner.
Corners With A number of Dovetails
If the model of body has two or three holes in every nook, be sure you are utilizing the right size dovetail for the depth of the opening. Within the nook that you simply’re engaged on, insert all of the dovetails together with your fingers after which begin tapping them in. Begin with the longest one first. Having the others in place will assist help the nook while you begin hammering. Additionally, you will have to help the body fastidiously from beneath the within edge whereas inserting the quick dovetails. As a result of that space is floating it’s exhausting to push or hammer towards. You may attempt utilizing a stack of mountboard or much like provide help, however your fingers will in all probability work higher.

Assembling a 2-dovetail nook. Step 1.

Use your fingers to provide help beneath the interior floating edge, significantly when tapping within the interior dovetail.

This tray body connects with one lengthy and two very quick dovetails.

On this three dovetail nook, the 2 interior dovetails are so quick that they’ll push in with simply your fingers.

That is the angle to carry the bar at. You may help it with one thing propped beneath the floating edge, however if you’re mild when inserting the dovetails, your fingers will work very properly.
Wiping Off Extra Glue
When you’ve got laid out the body on a sheet of paper or card, you’ll be able to keep in the identical place and rotate your paper round to maneuver the following nook to you. When you have got tapped the dovetail joiners into every nook, use the damp material to wipe away any glue that has squeezed out on the again and sides. It is best to have used sufficient glue that just a little squeezes out, however not quite a bit. When you find yourself completed with all 4 corners, use the damp material to wipe away any glue that squeezed out on the entrance. Maintain it at an angle to the sunshine with the intention to see that you’ve got eliminated all of the glue from all sides and there’s no shine.

Wipe any glue off the again as you go, with a humid material.

Glue on the again of a 3-dovetail nook.

When you find yourself completed with all of the dovetails, flip the body over and wipe off any glue from the entrance. Right here there’s glue on the highest and on the fitting facet.

Wiping with a clear damp material after which drying, will help you verify that every one the glue has been eliminated.
Do a remaining inspection by laying the body face up and checking that it’s flat and the mitre be part of traces are clean throughout. If something is uneven you’ll be able to gently push the raised facet of the mitre in the direction of the desk to get every part completely flush.
Let the Glue Dry Nicely Earlier than Utilizing
Till the glue is totally dry, the corners are usually not that sturdy. Wait not less than a number of hours earlier than you mount your art work and add the hanging {hardware}. It’s even higher to attend 24 hours, in the event you can. A lot of the body mouldings are ready-finished, however in case you have chosen unfinished wooden then you’ll be able to add your individual end reminiscent of acrylic paint, spray paint, stain, metallic leaf, clear or colored wax, or varnish. As soon as your body is assembled and dry you’ll be able to then mount your art work and add your hanging {hardware}.

The body is now able to mount your art work.
Additional Studying
Stretch Canvas: a Visible Information
Use the Canvas Wedges That Include a Canvas or Stretcher Bars
Selecting the Proper Body for Your Paintings
Charvin Oil Paints – Largest Color Vary within the World
Store Jackson’s Bespoke Framing on jacksonsart.com
Store Jackson’s Prepared-Made Frames on jacksonsart.com


