

Wooden engraving is a reduction printmaking method the place a picture is carved into an endgrain block of hardwood – the density of the endgrain wooden permits for very superb element to be translated within the completed print. On this movie, wooden engraver Duncan Montgomery takes us via the basics of this printmaking technique, introducing necessary ideas, and offering demonstrations and suggestions that will help you get began with this intricate printmaking method.
Contents
0:00 Introduction
0:20 What’s Wooden Engraving?
1:42 What’s the Distinction Between Woodcut and Wooden Engraving?
2:11 What Woods are Used?
2:39 Caring for Wooden Blocks
3:30 Getting ready the Floor for Engraving
4:18 Transferring a Design to the Wooden Block
6:51 Kinds of Engraving Instruments
9:57 Utilizing a Sandbag to Assist the Block
10:47 The Engraving Course of
14:14 The Printing Course of
18:23 Adjusting You Block After Printing
19:31 Cleansing After Printing
19:48 Trying After Your Instruments
22:00 A Abstract of the Wooden Engraving Printing Course of
22:45 Credit
Extract
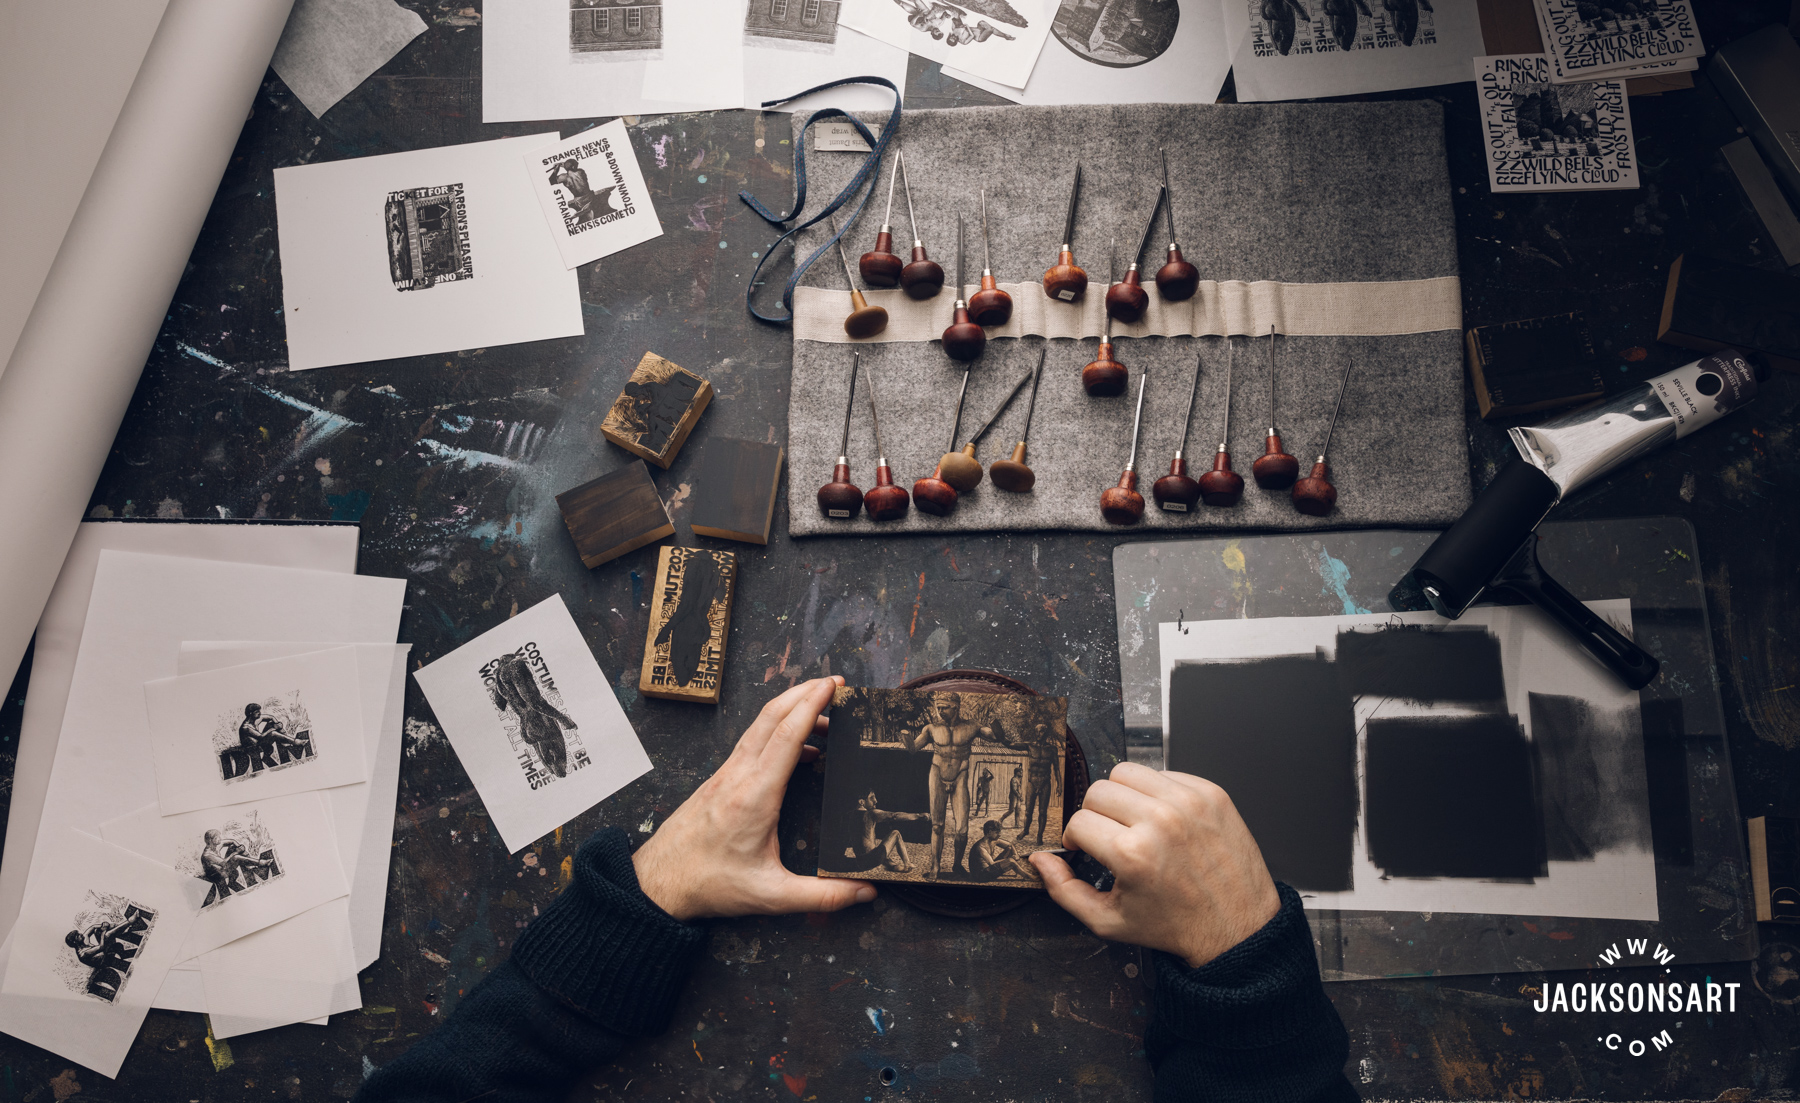
Hello, my title’s Duncan Montgomery. I’m a printmaker specialising in wooden engraving, and I’m right here within the Jackson’s Studio to indicate you what wooden engraving is and easy methods to get began.
What’s Wooden Engraving?
In essence, wooden engraving is the method of printing from a flat block of wooden, into which you’ve reduce a design. It’s a type of reduction printmaking like linocut or woodcut. This implies the ink is transferred from the raised floor of the block onto the paper, and the print can be white within the areas the place you’ve reduce the floor of the block away. It’s out of that interaction of black area and white area that you simply’ll make your print.
That description makes it sound like a reasonably easy and rudimentary type of printmaking, and to an extent that’s true. However wooden as a cloth is able to holding very superb element, way more element than lino, as an illustration. A tiny chip or scratch from the floor of your block will have a tendency to indicate up within the completed print. In consequence, wooden engravers can use totally different shades of gray, in addition to black and white, by stippling the floor of the block or engraving strains throughout it.
The wooden is comparatively costly, sluggish to engrave, and might maintain lots of element. Your common wooden engraving tends to be fairly small. You’d be extra prone to design a card, a e book illustration, or a e book plate as a wooden engraving slightly than a poster. Actually large, daring work is best suited to different printmaking strategies like lino, woodcut, or display screen print.
What’s the Distinction Between Woodcut and Wooden Engraving?
The distinction is basically that woodcuts are made on planks of wooden – sections of wooden which are reduce within the route that the tree is rising, which is softer and fewer even in density than an endgrain woodblock.
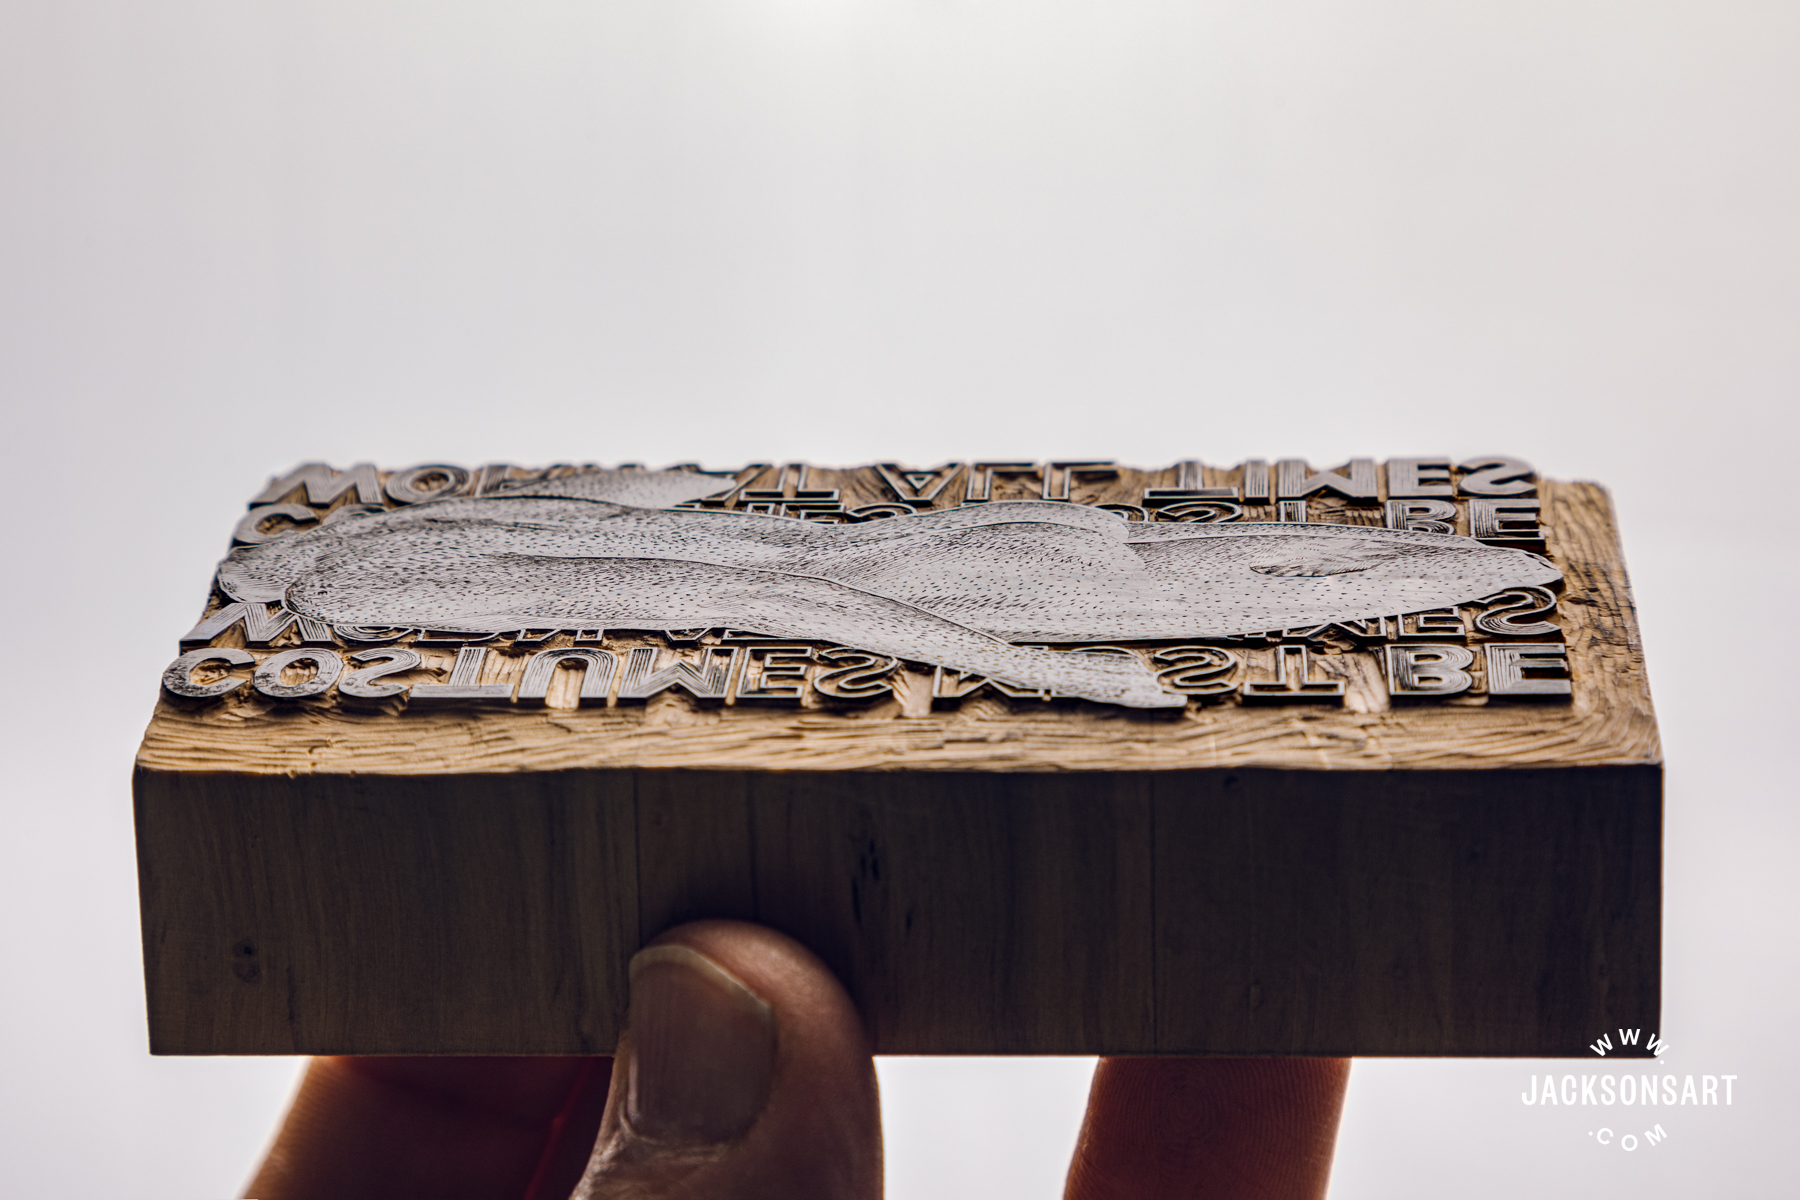
Wooden engravings are achieved on endgrain woodblocks, so that you’ll be chopping a round part of the tree, perpendicular to the route that the tree is rising. That signifies that the floor is difficult and even in density, and it will possibly maintain lots of element. You’re searching for slow-growing and due to this fact very dense hardwoods like maple, holly, or pear wooden, and initially boxwood, which could be very a lot the luxurious choice nowadays attributable to its rarity. A lot of these bushes have been reduce down.
Wooden Engraving Blocks
Jackson’s sells lemonwood blocks made in England by Chris Daunt, who’s the UK’s solely skilled block maker, or a minimum of the one one I do know of. They’re actually top quality, and admittedly, I discovered that lemonwood is able to virtually something.
Wooden blocks aren’t actually fragile, however they’re a pure materials. There are a few issues that you simply need to keep away from when storing them. Mainly getting them moist or exposing them to sudden or very broad swings of temperature.
Chances are you’ll discover that with the bigger blocks, they’re composed of two or extra items of wooden which were joined collectively. Which isn’t one thing to fret about. The block ought to be stable. You’re unlikely to see something however the faintest line within the print if something. However for those who get the block moist or for those who warmth it up or cool it down shortly, these two items can increase and contract at totally different charges. And that forces them aside.
Even wooden blocks made of 1 piece of wooden can warp for those who don’t deal with them nicely. So don’t go away them on the radiator or the airing cabinet. Search for someplace dry and reasonably cool. It’s a good suggestion to maintain them out of direct daylight even while you’re engraving.
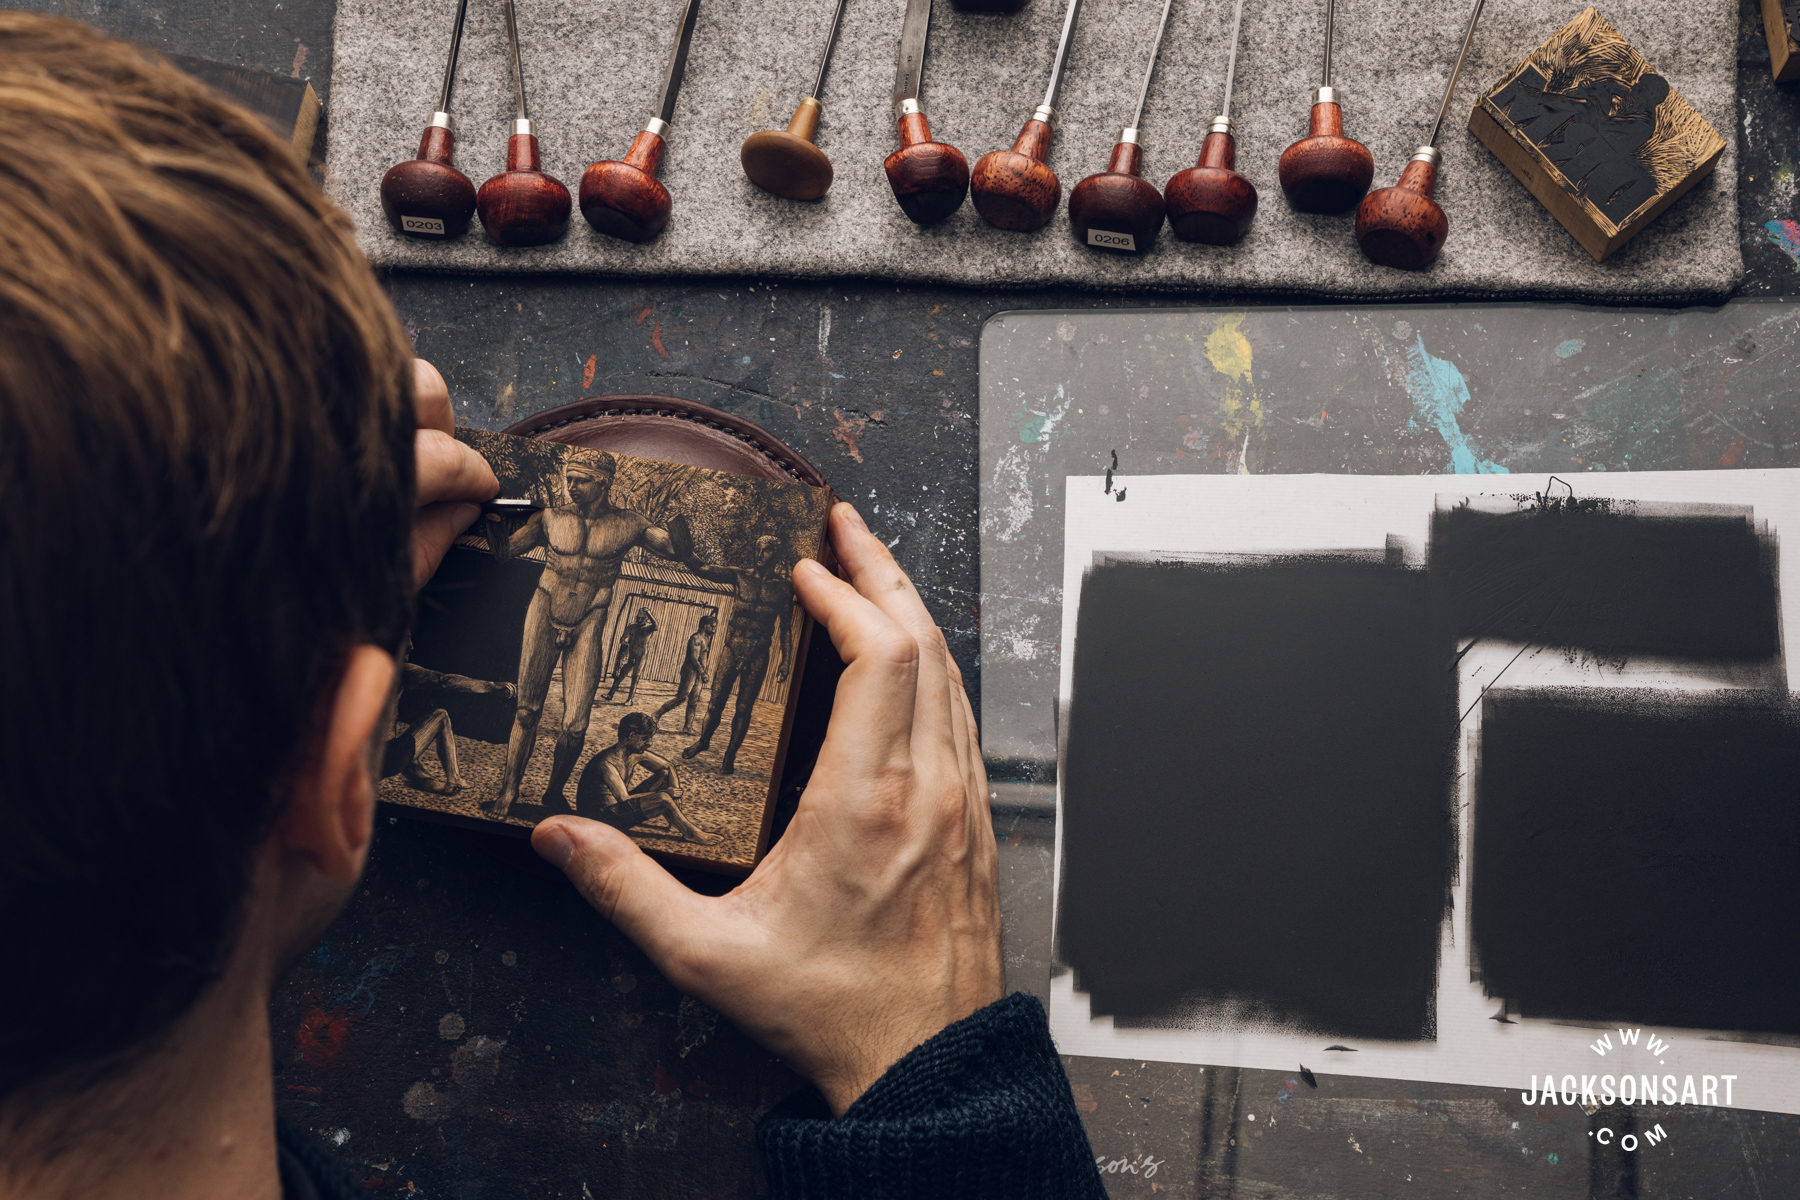
Getting ready the Floor for Engraving
I put together the block for engraving by making use of a layer of black watercolour to its floor, which is important so you possibly can see the place you’re going while you’re engraving. You can too roll on letterpress ink for those who desire, which might be barely higher for the block in all honesty. I’d keep away from utilizing pen ink, as I’ve discovered once in a while that the ink stains not simply the floor of the blocks, but in addition the wooden under, which ruins the wooden block, actually, as a result of you possibly can’t see any of the cuts that you simply’ll make. Usually, you’d make a reduce, after which it’ll present the color of the wooden. Whereas if it’s stained under the floor, you gained’t have the ability to see the place you’re going.
I have a tendency to attract across the edges of the block after which use fineliners to attract inside this space in order that you understand that you simply’re designing on the identical scale. You would possibly need to make one thing fairly daring which you can simply hint. As soon as the drawing’s achieved, I stick some tracing paper over it and hint the drawing. Do not forget that the print will flip while you take a print from the block.
You can also make little notes on the floor of the block, which has been painted black, so that you’ll have the ability to see the graphite, then draw round and join the dots because it had been.
Or, you possibly can put lots of graphite on the opposite facet of the drawing with a 4B or 6B pencil. And then you definately flip it and draw via on the opposite facet. Don’t press too onerous since you’ll threat barely scoring into the floor of the block, and the block actually must be completely flat. However simply onerous sufficient to switch your drawing.
So now you’ve your drawing transferred onto the floor of the block. You’re able to go; you possibly can choose up your instruments.
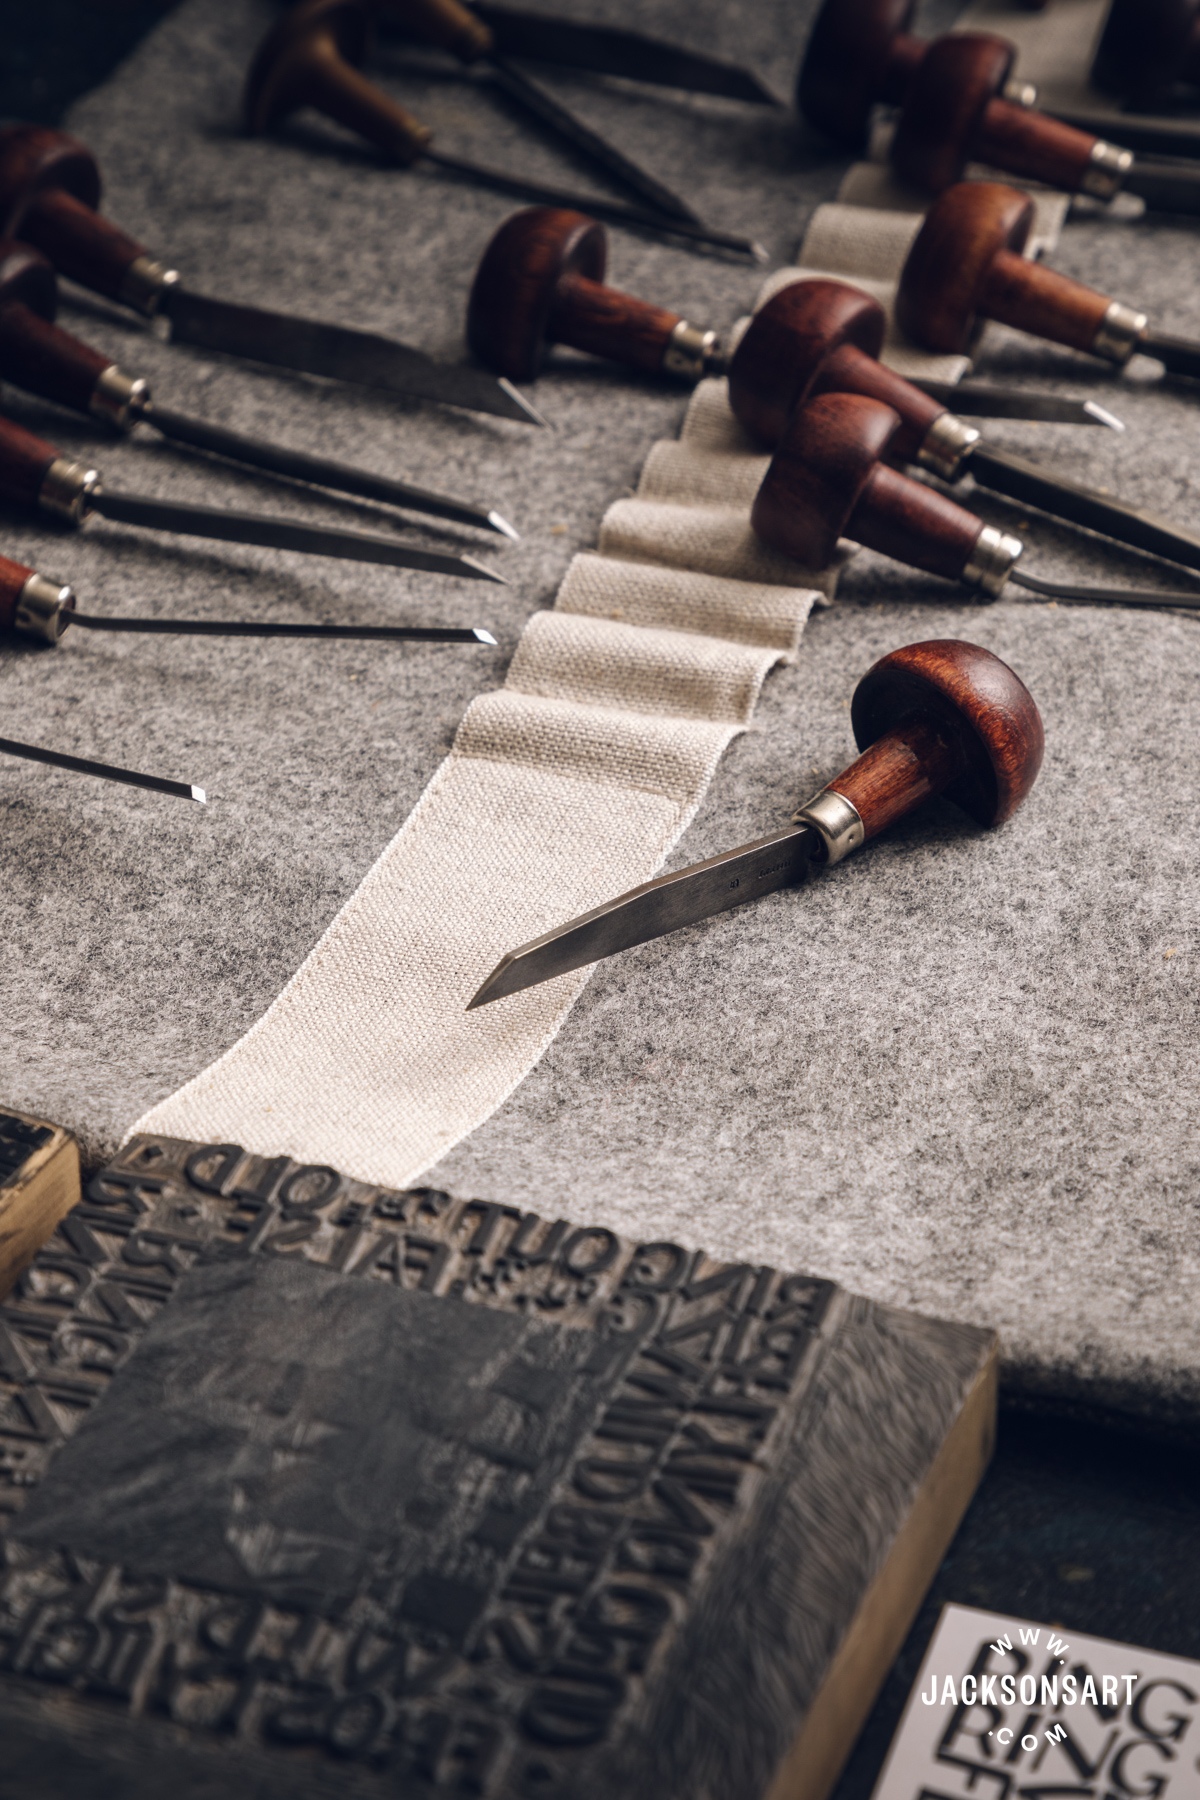
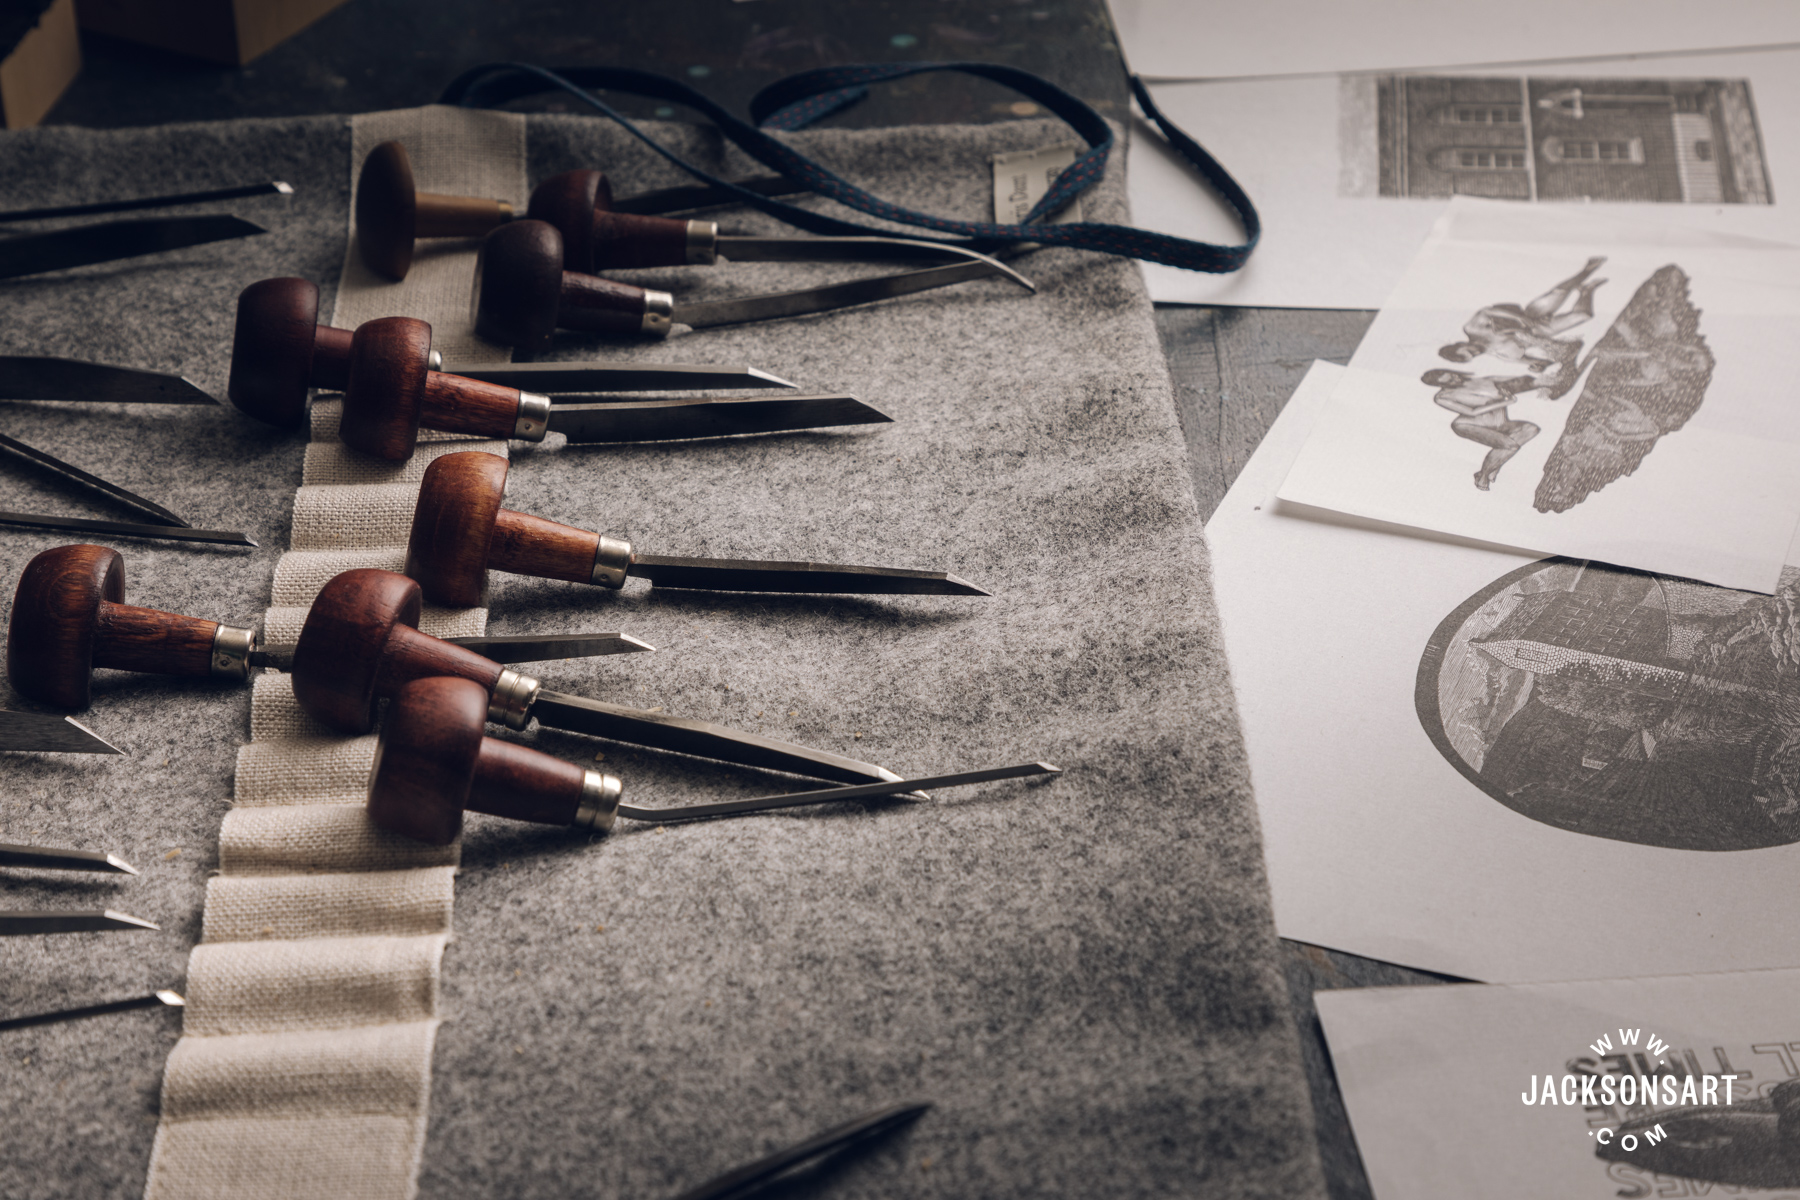
Wooden Engraving Instruments
Wooden engraving instruments are referred to as burins. They’ve a picket butt on the backside and a shank of steel with a chopping face on the finish. The picket butt of the instrument goes within the palm of your hand, and also you’ll curl your fingers into the little recess. After which use your thumb and your forefinger to carry the instrument. Something that feels snug to you is ok. There’s no actual proper or improper method of doing it.
There are a number of several types of burins which are used for making totally different marks on the woodblock. The sq. graver and lozenge graver are fairly comparable; they’ve sq. or lozenge-shaped chopping faces on the finish. They can be utilized for drawing straight strains, they usually can even draw curved strains on the block.
Spitstickers have an elliptical chopping face. They’re barely higher for carving curves as a result of the blade will get thicker the deeper you push it into the wooden – the additional it goes in, the broader the reduce you make.
The tint instrument has comparatively straight sides. The thought is to make use of thicker ones to create a collection of parallel strains, which produce a gray tone.
The scorper has fairly a large chopping face for making dots or fairly gentle stipples, so it’s helpful for producing a sort of gentle gray tone. The scorper can be helpful for eradicating massive areas of the block.
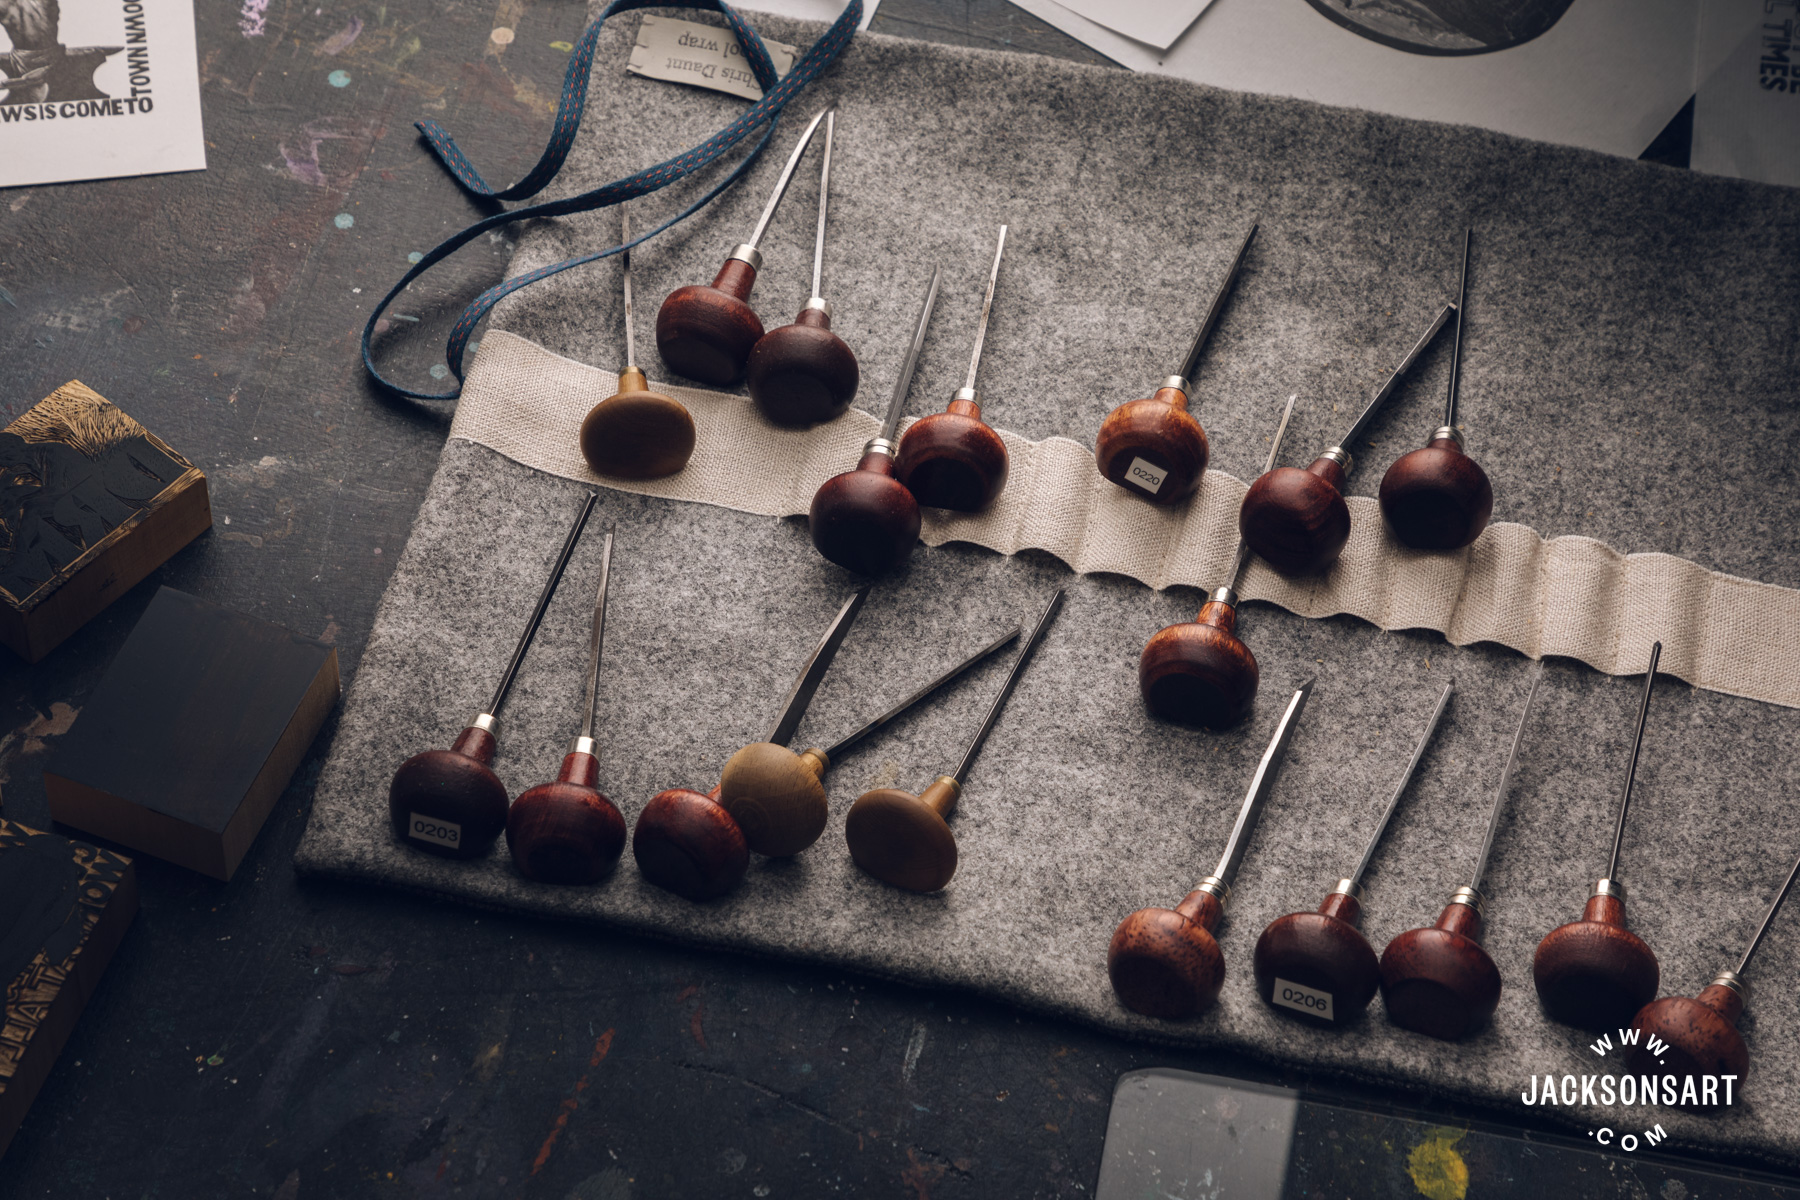
By way of what instruments it’s essential to get began, I’d advocate two or three instruments. A sq. graver and a spitsticker, they’ll be good for drawing curves, strains, and for detailed bits of chopping. You can too use these to stipple totally different areas of the block to get gray tones. You’ll want a minimum of one instrument that’s fairly large – I’d advocate getting a medium spherical scorper.
If you wish to begin with two instruments slightly than three, that’s superb. I’d make the scorper one among them. So have the scorper for eradicating massive areas after which both the spitsticker or the graver for the extra detailed work.
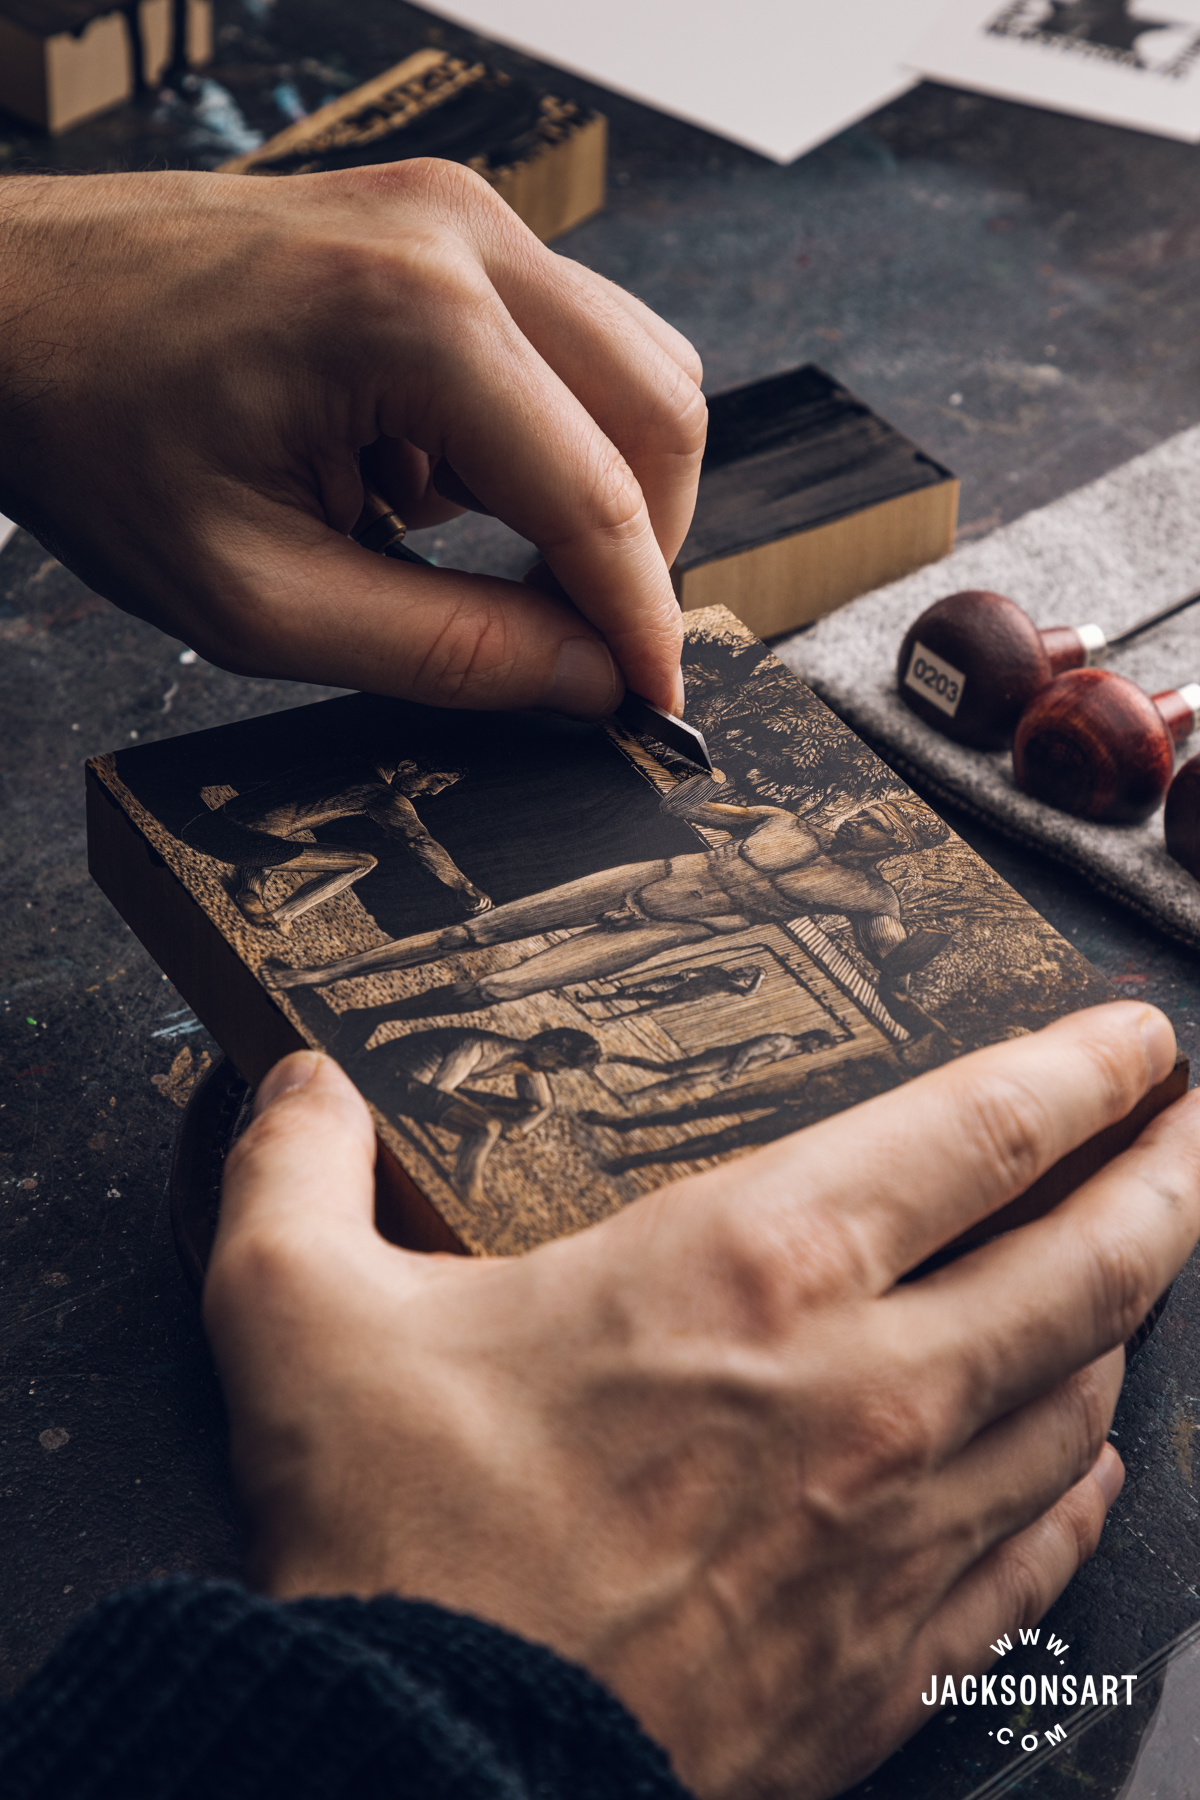
The Engraving Course of
The sandbag helps the woodblock whilst you engrave. You can too use a thick e book, like a Dickens e book or one thing like that. You’ll have one hand holding the block, the instrument within the different hand. In case you’re doing it flat on a desk, it’s onerous to get the precise angle, for one, and secondly, for those who slip, you’re liable to sort of stab your different hand. I’ve achieved that sufficient instances to at all times use a sandbag now. It additionally makes it barely simpler to spin the block – while you’re attending to totally different areas of the block from totally different angles, you’ll tend to try this by twisting the block slightly than by transferring your arm round.
I’d say that basically, a block will print barely darker than it seems. So don’t make your chopping too dainty. After which most significantly, go sluggish. You may’t put the wooden again when you’ve reduce it away. And any errors you make, you’ll simply should model out or reside with. So suppose twice, reduce as soon as is the rule. It’s meant to be a meditative and considerate exercise. And even a small one might take 5 days. So don’t rush it.
Trying After Your Instruments
Earlier than we transfer on to printing, I simply need to point out somewhat bit about easy methods to take care of your instruments. There’s not that a lot to do, however most individuals who’ve written manuals on wooden engraving have mentioned it is best to wipe them down and put a little bit of machine oil over the floor simply to cease them from tarnishing.
One factor you actually do should maintain doing is sharpening your instruments. In case you don’t, then they gained’t chunk into the floor of the block cleanly, they usually’ll simply skip about on the floor. It’s actually onerous to manage a blunt instrument, and any nice engraving you do handle to do will look worse. It’ll look scrappy.
Tilt the angle of the instrument in the direction of the sunshine and also you’ll see that it comes from the manufacturing facility with a flat face on it. What you’re attempting to do by sharpening is to maneuver that chopping face very barely again in the direction of the deal with of the instrument with out altering the angle or introducing a lot of totally different aspects, so it’s fairly a fragile operation. You want a sharpening stone to do it.
Do not forget that the chopping face is supposed to be very flat. So what you usually do is put a drop of oil on the floor of the sharpening stone, after which you possibly can transfer the instrument round till the oil bunches out of the edges. Then you definately simply transfer it ahead and backward with a flat movement. Just a few backwards and forwards on the sharpening stone ought to be sufficient to present you a pointy edge. You’ll additionally discover it simpler to attain a continuing angle between the face of the instrument and the stone for those who run your finger down it.
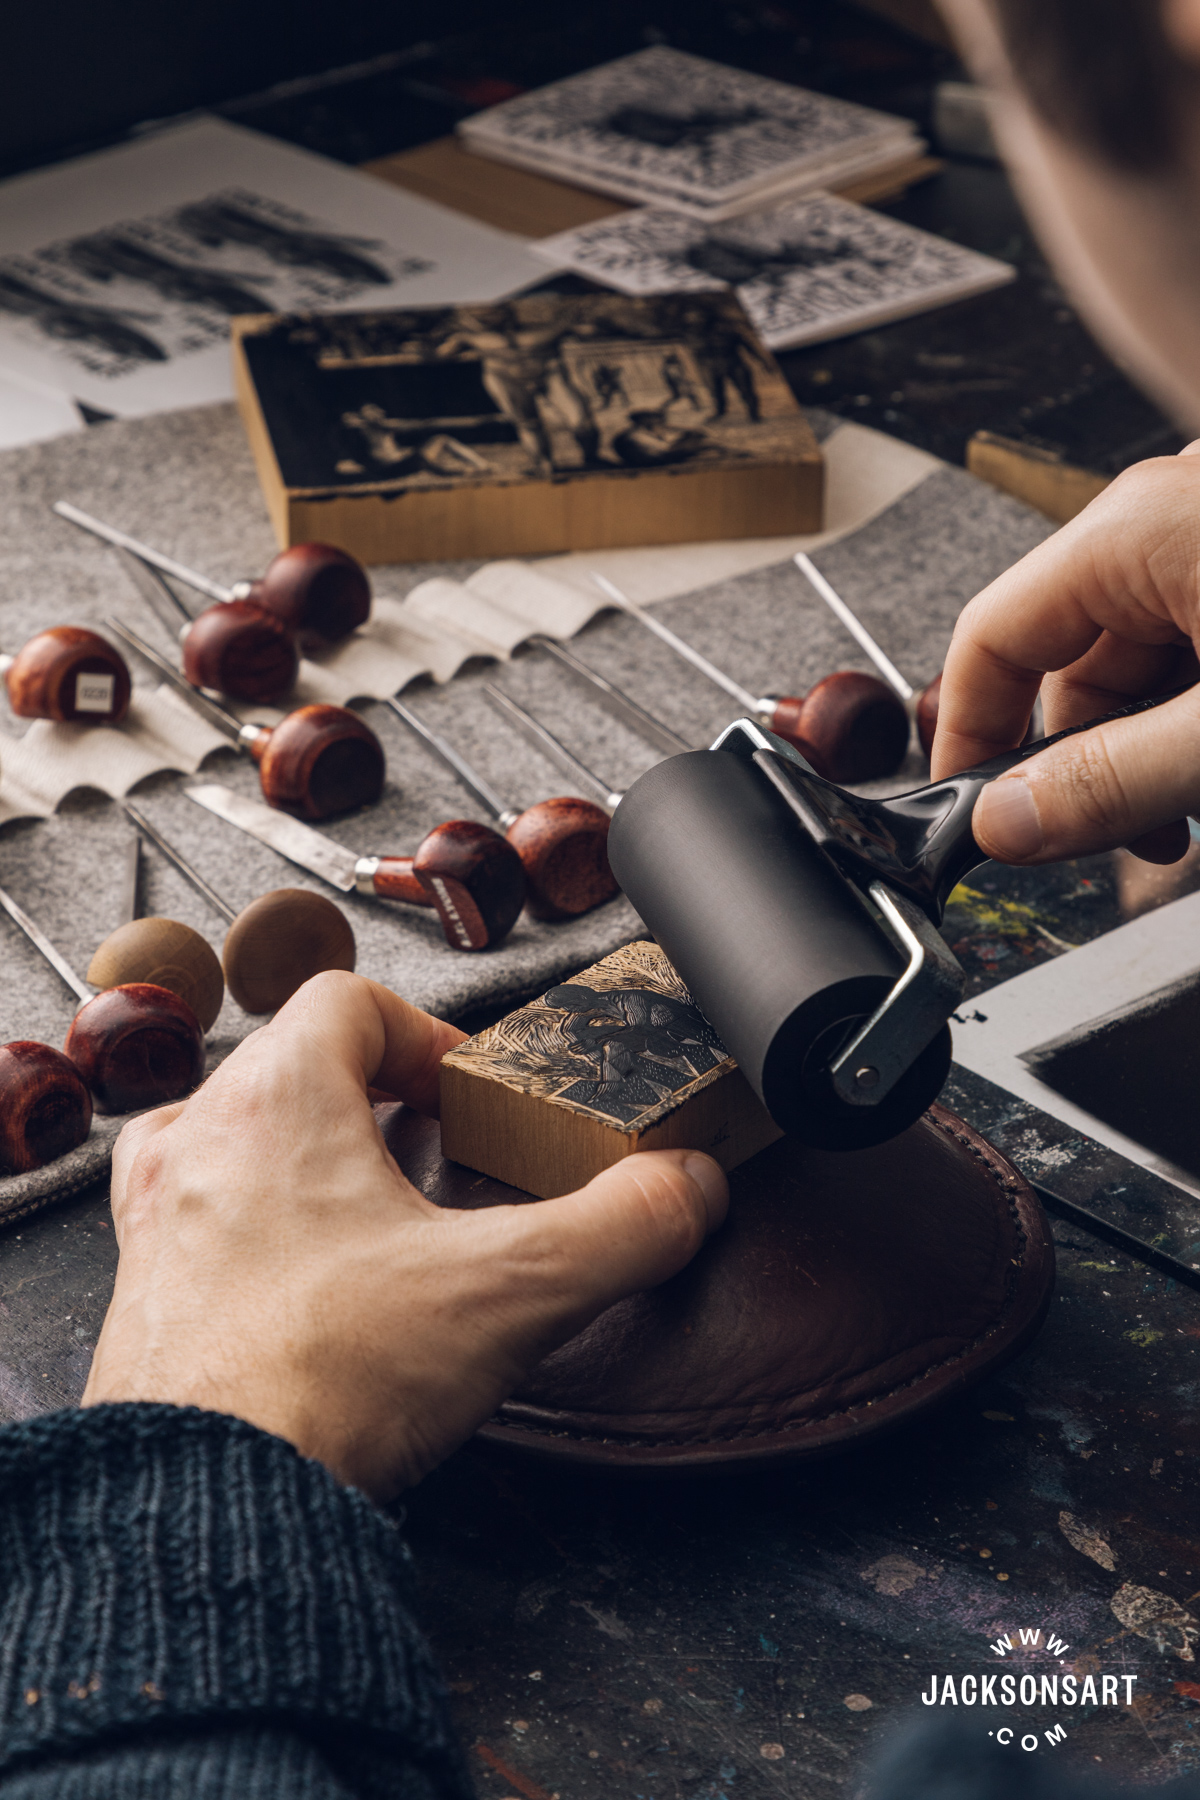
Printing
You may print wooden blocks utilizing a printing press, or you possibly can ask knowledgeable letterpress printer to print your block for you. However printing by hand requires much less tools. It’s completely straightforward to do, and it’ll offer you a outcome instantly. It’s completely appropriate for small engravings, significantly for those who solely want a number of prints.
So the strategy is de facto easy. We simply must roll ink onto the block and press some paper onto the highest of it in order that we get a print.
I’m utilizing black letterpress ink right here. There isn’t a such factor as wooden engraving ink, so far as I do know. So search for printmaking ink or letterpress ink. The ink is de facto sticky, and that’s key to its suitability. It’s additionally oil-based, so that you’ll want a solvent of some form, both turps or an artificial solvent, to scrub up when you’re completed. You may’t use different sorts of inks and paints, so that you want letterpress ink. Acrylic or oil paint gained’t have the precise consistency.
So, I put a few of it out onto the slab and roll it on high of the block. You don’t want a lot, only a toothpaste-sized squidge can be fully superb. It goes a great distance, simply roll it out right into a sq..
You’ve bought to carry the curler off the slab each push so that you simply’re spreading the ink out correctly. And you may hear the hiss of the stickiness of the ink while you’re doing this. Now give a few passes excessive of the block. Not an excessive amount of. In case you take a look at it carefully, it’ll be glistening at this level.
After which I simply want to use some paper. Ideally, simply press it down along with your thumb or your finger onto the floor of the block. What you need to do is maintain it in place with one hand whilst you take a spoon and simply press via it.
We’re utilizing Sunomi Senaka – it’s extraordinarily clean on one facet, which makes it actually good for wooden engraving. It’s additionally skinny, so once I’m burnishing by hand, you possibly can really begin to see the print displaying.
So I’m simply taking care to cowl each inch of it in strain. The darker an space is, the extra time you’re going to should spend burnishing it with the spoon. Typically it’s fairly straightforward to slide off the sting with the spoon. In case you’re struggling, you may get some books that are barely lower than the peak of the wooden block and encompass it with 4 books – that may cease you destroying the print for those who slip off the facet. If it’s essential to verify the print, you possibly can at all times maintain one finger on the block and simply carry it up. You most likely gained’t get good prints off the block instantly – the print may be too darkish, and never choose up the entire marks, or it may be too gentle, with not sufficient time spent burnishing.
If, after you’ve printed, you discover you need to make adjustments to the block, you possibly can simply take a rag and brush off the ink onto the rag. You should use solvent for this. Which I’d encourage you to do while you’re lastly cleansing up on the finish of a printing session. The solvent doesn’t dilute the ink a lot. So it doesn’t run down into the cuts that you simply’ve made.
Now that the block is clear, you possibly can contact it up if wanted. So, if you wish to do some extra engraving on the block, you need to use some French Chalk or talcum powder. Rub it into the floor of the block so that you could see the picture far more clearly. It’s not good, nevertheless it’s higher than attempting to engrave a completely black block.
In case you’re comfortable and also you’ve printed as a lot as you want, you’ll want to scrub up the curler and the block utilizing white spirit, turpentine, or a less-toxic substitute. Apply a number of drops to a rag and simply rub the ink off.
I’ve solely scratched the floor, so for those who want extra steerage, there are good manuals on the market by Simon Brett and one other by Chris Daunt.
And possibly your first port of name by way of inspiration or steerage, and even discovering some educating, could be the Society of Wooden Engravers. They’re the principle collective physique for wooden engraving within the UK.
So thanks very a lot, and comfortable engraving.
Additional Studying
Artist Insights: Duncan Montgomery
Portray and Printmaking Methods of the Brotherhood of ‘the Ancients’
Making Handmade Playing cards with Wooden Engraving
The whole lot You Must Know About Printmaking Paper


