

On this planet of music manufacturing, one of many secrets and techniques to a signature sound lies in pattern flipping. Whereas many producers chop samples, top-tier producers make the most of artistic sampling methods that lead to really unique sounds.Pattern chopping is the method of slicing a pattern into smaller items, whereas pattern flipping is the broader strategy of taking a pattern and manipulating it to create a brand new musical thought. On this weblog, you’ll discover ways to use Native Devices 360 Plus merchandise to rework your samples into inspiring sounds, leading to really distinctive components to your subsequent monitor or remix.
Bounce to those sections:
Comply with together with this tutorial and flip your personal samples with a 360 Plus subscription.
Pattern flipping methods
Let’s discover methods for pattern flipping utilizing Battery 4, Transient Grasp, Guitar Rig 7, Huge X, and Raum.
Chop a loop in Battery 4
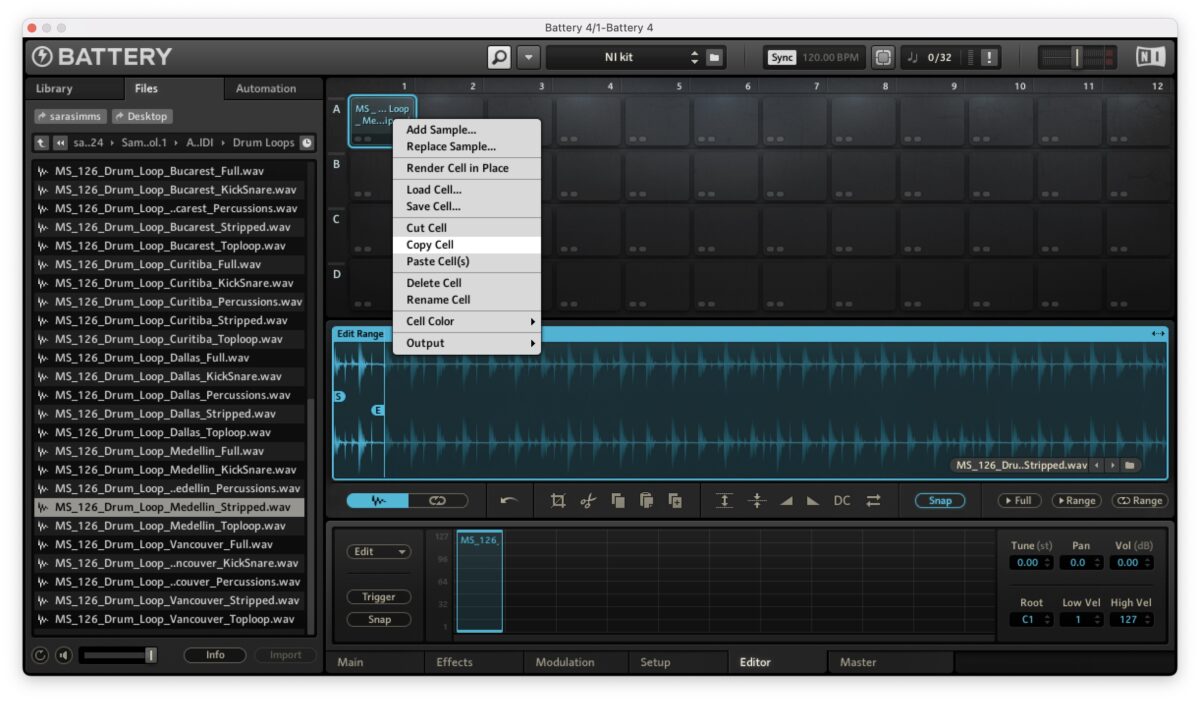
Chopping a loop remains to be a helpful method to make use of in a music manufacturing workflow. Utilizing Battery 4, you may manually outline your personal samples in Battery’s Pattern Editor. Begin by loading a loop into Battery 4. Drag any audio file out of your pc’s file browser onto an empty cell within the Battery.Enter the Pattern Editor by choosing the cell containing your pattern and clicking the Editor tab on the backside of the Battery window. The pattern waveform shall be displayed within the Waveform Management space. Alter the pattern begin and finish markers (labelled “S” and “E”) to play a small part of the pattern.

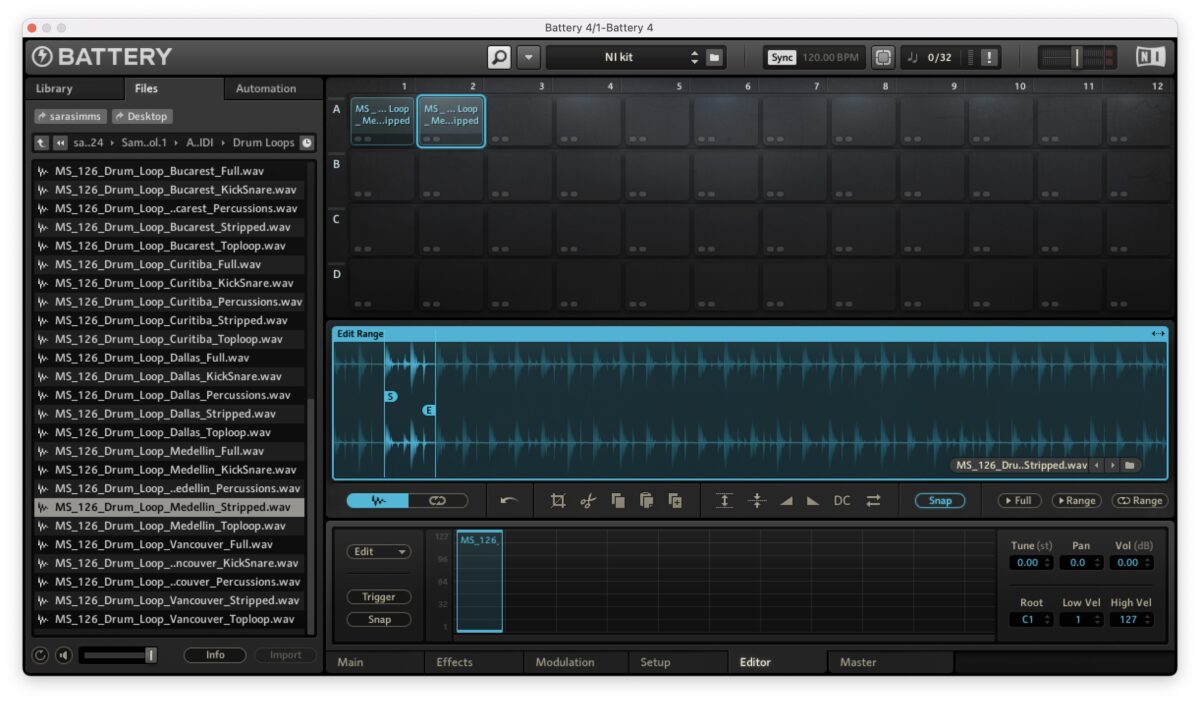
Copy the primary cell to a brand new pad and alter the beginning level and finish markers of the loop to play one other part within the second cell.
Repeat the method of copying the loop, pasting it to a brand new cell, and adjusting the part of the loop that performs.
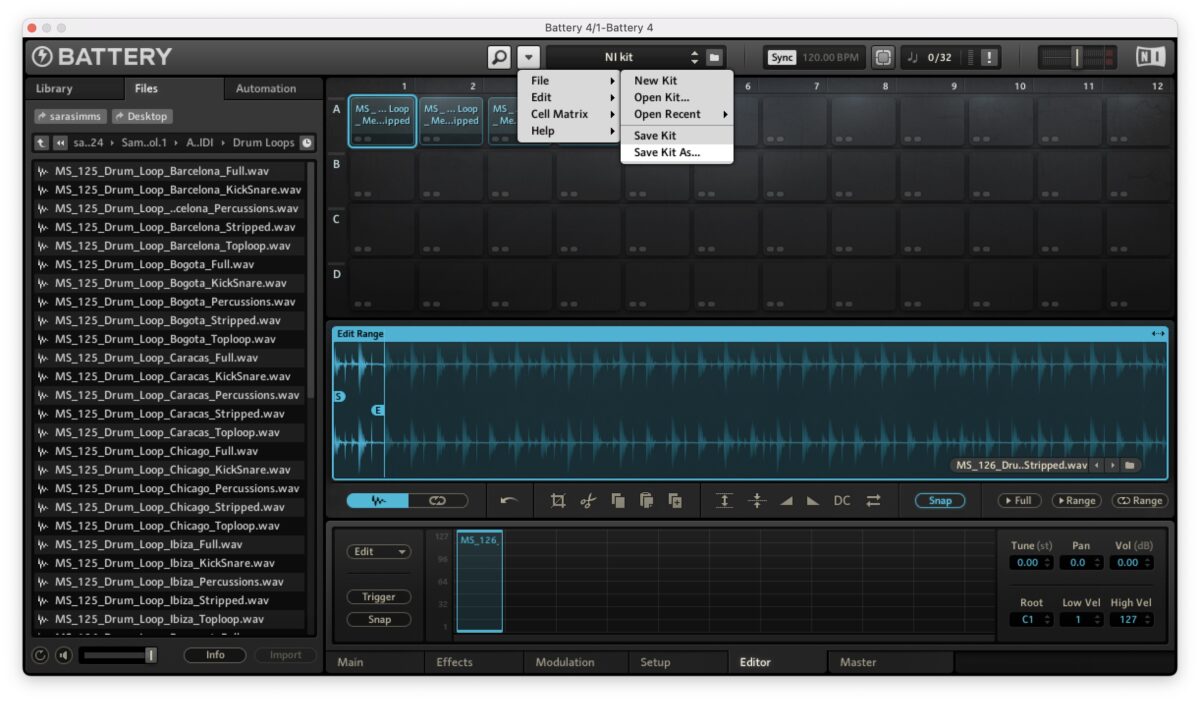
Save your drum equipment in Battery by clicking File / Save Package as and naming your equipment. Subsequent, use a MIDI controller to report a MIDI sample together with your drum equipment. Play the corresponding pads to the sections of the samples you chopped to play the samples again in a brand new method. You possibly can report your loop, bounce it out of your DAW, and use it in your session.
Form samples with Transient Grasp
Transient Grasp is a dynamics processor that can be utilized to form the preliminary assault and maintain of audio alerts. Use Transient Grasp so as to add punch to samples, or soften the maintain to shorten the decay or tail of the sound to make the general rhythm tighter.Begin with a kick drum pattern, like one from a pattern pack.
On Transient Grasp, flip the Assault knob to the correct between 20% and 30% to spice up the transient – the preliminary onset of the sound.
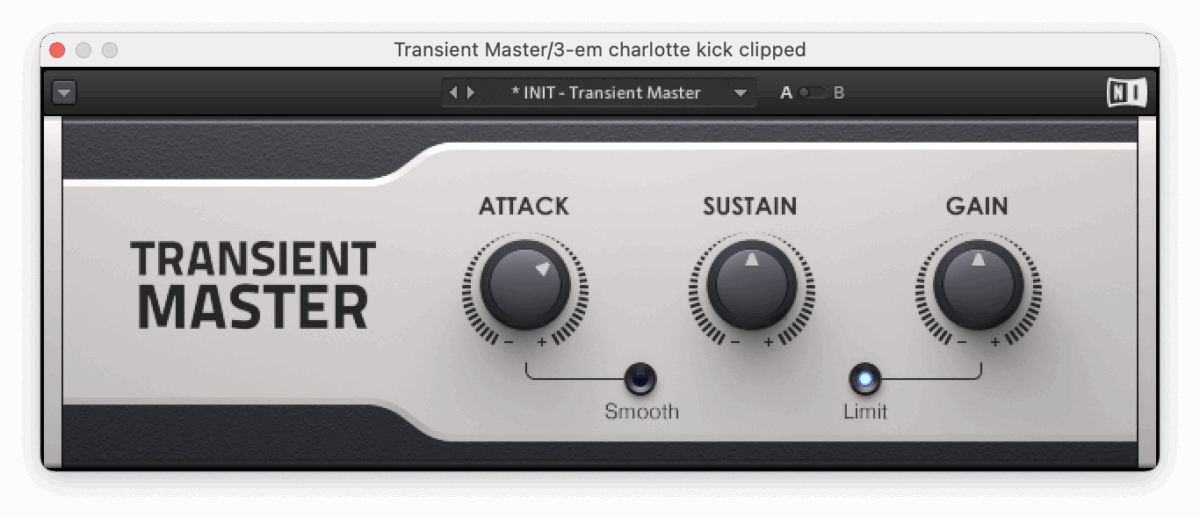
For a extra aggressive sound, improve the Assault to 70%.
Attempt decreasing the Maintain to cut back the extent of the top of the sound. This reshapes the pattern and makes room for the transient to chop by.
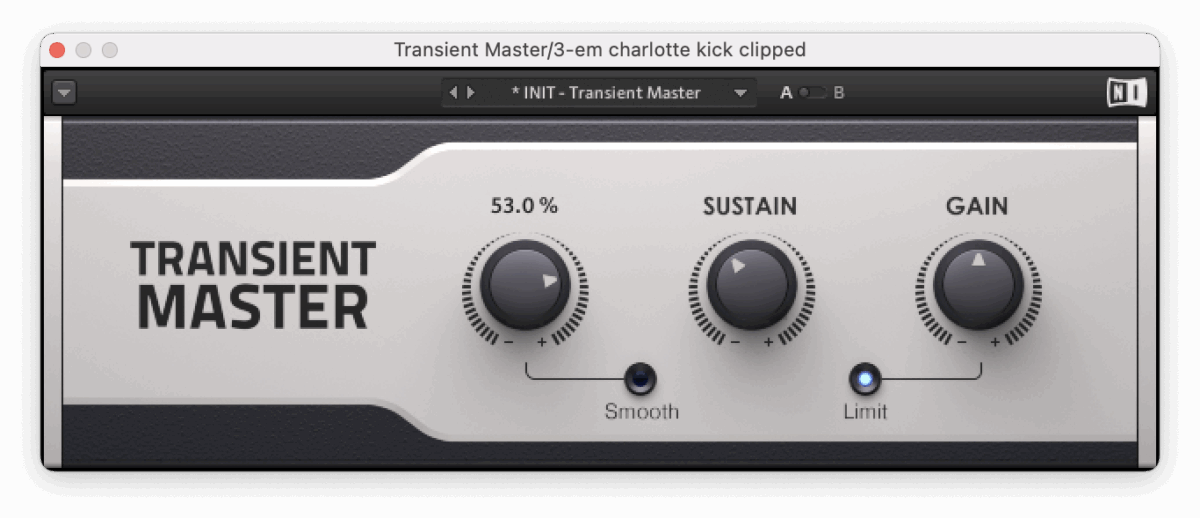
Attempt decreasing the maintain on particular person samples or a prime loop. Progressively deliver the maintain down, eradicating resonance, room sound, or lengthy reverb.

Add in a kick drum with a definite transient, and take heed to how the groove sounds tighter as soon as each sounds have been reshaped with Transient Grasp.
Add results with Guitar Rig 7
So as to add artistic results to samples, look no additional than Guitar Rig 7. Whereas Guitar Rig is often used for processing guitars, it may be used so as to add all kinds of untamed results to any audio pattern.
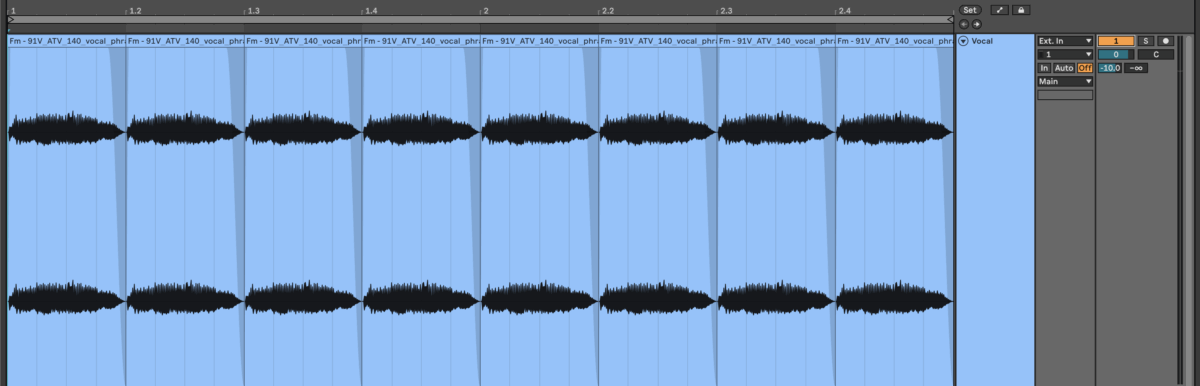
Attempt utilizing Guitar Rig 7 to course of vocal samples. Begin with a dry vocal pattern.

Create a bus, and add Guitar Rig to it. Including Guitar Rig on the bus channel provides you with extra management over how a lot of the vocal is distributed to the impact. Within the FX Sorts part, select Distortion and Bitcrusher. Select one of many many wonderful sounds, and switch up the Ship on the vocal channel to ship it to the Guitar Rig 7 bus.
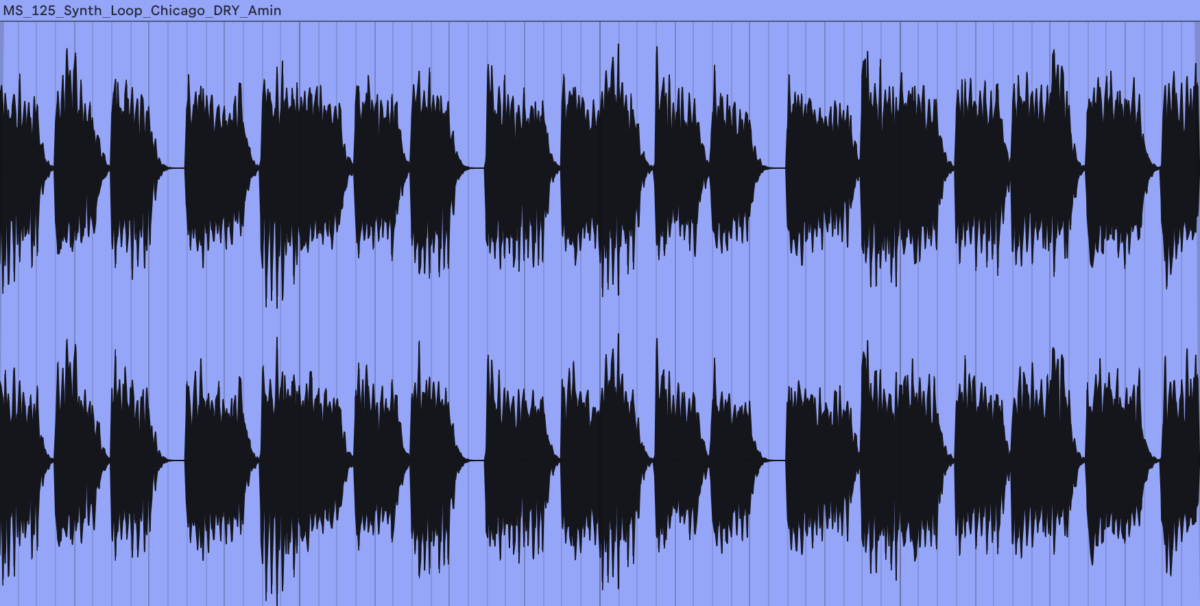
Subsequent, let’s discover the Modulation part of Guitar Rig. Select a easy dry pattern, like a synth loop.
Load Guitar Rig 7 onto the audio monitor, and within the FX Sorts part, navigate to Modulation, after which Refrain. Begin by scrolling by the presets obtainable, and check out the Lovely Classic Vibrato, or your favorite preset on the monitor. Every preset consists of an impact chain that you need to use as is, or tweak to customise and reserve it.
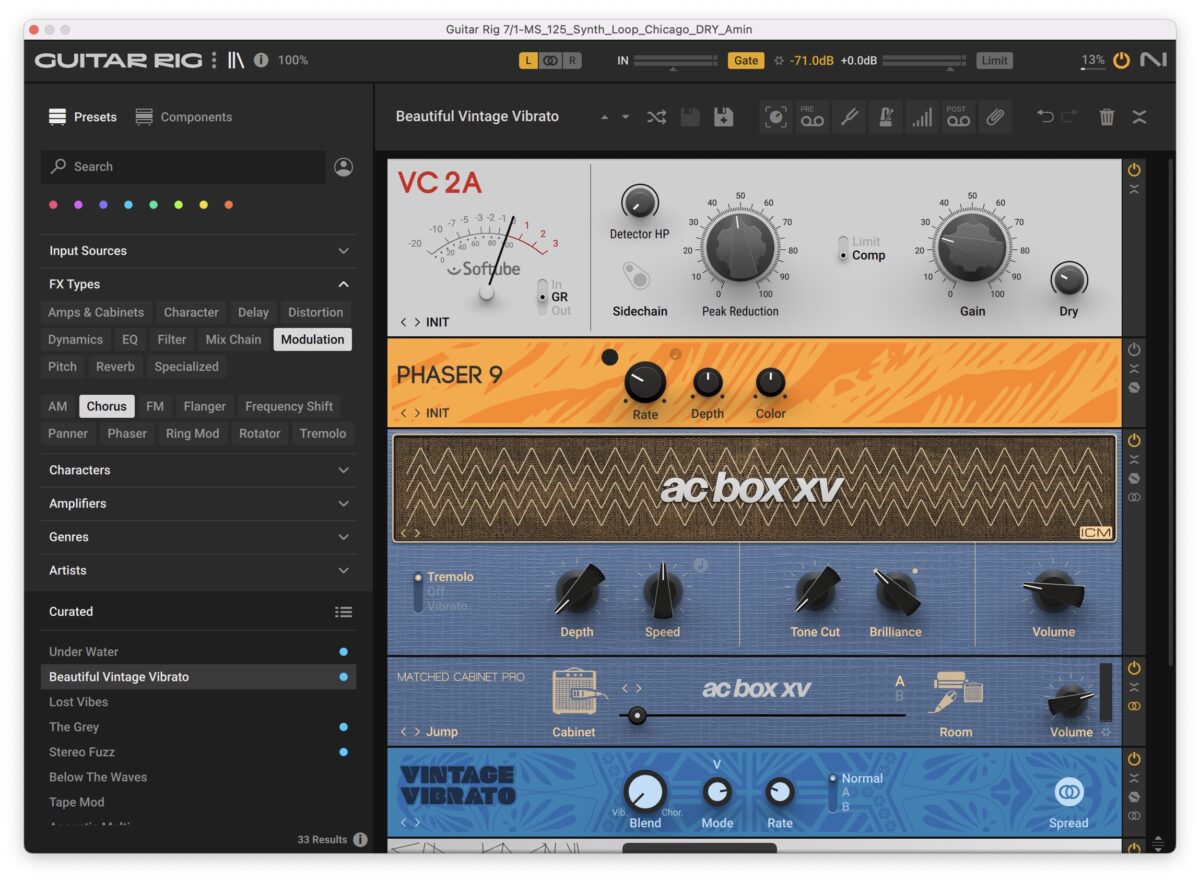
To print the impact to the audio, bounce out the synth sound with the Refrain on it and use it in your subsequent monitor.
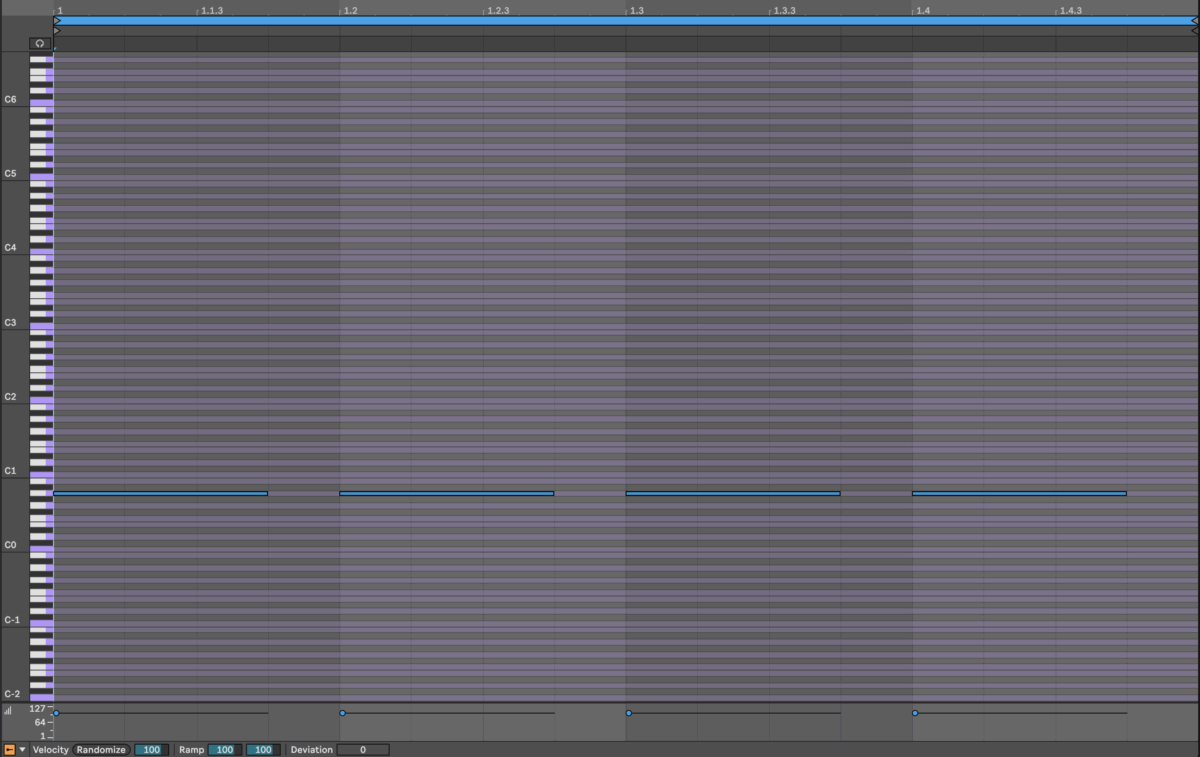
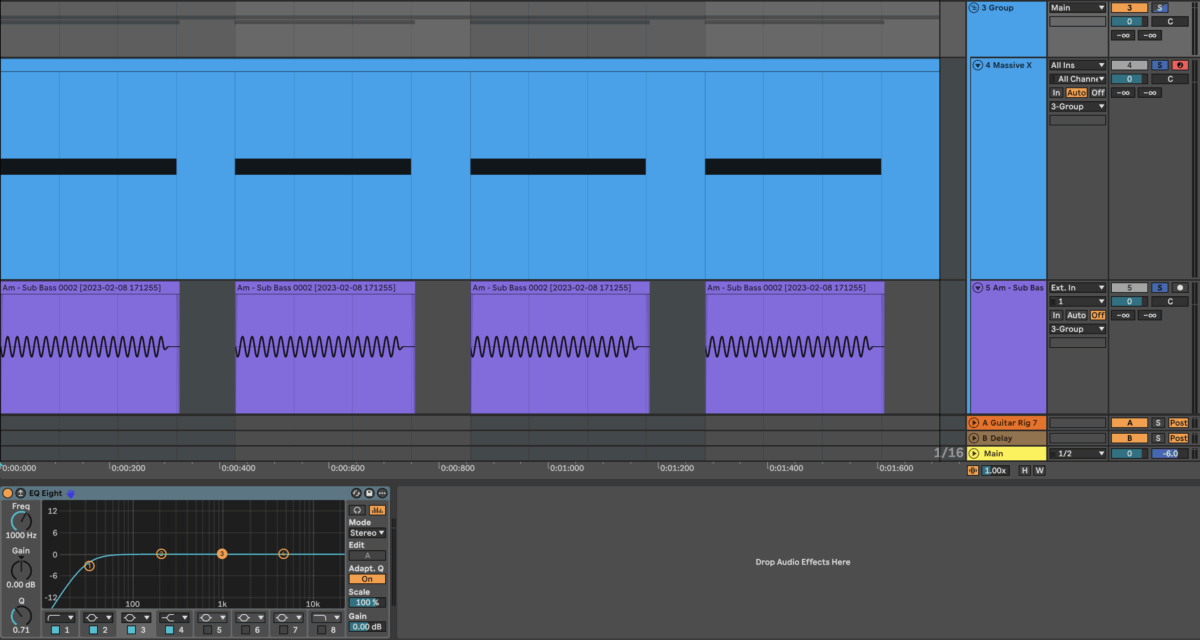
Make a layered sub bass with Huge X
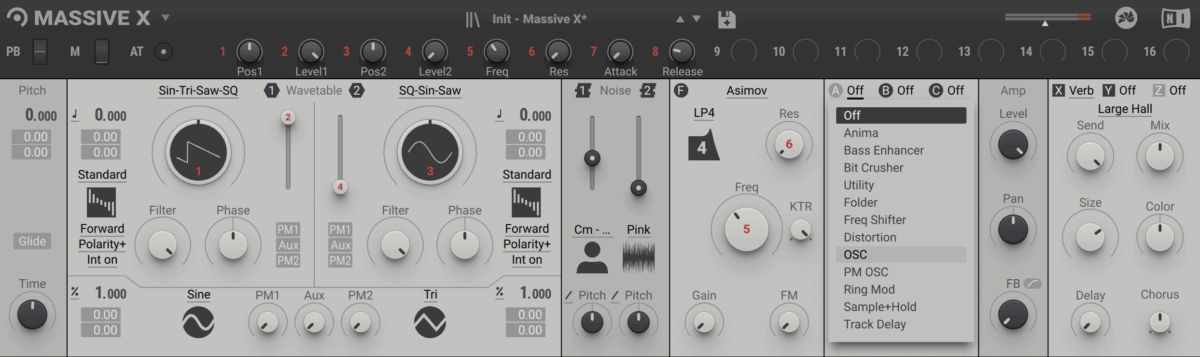
You possibly can import a pattern into Huge X’s noise oscillator to make use of its filters, modulators, and results for a singular sound design processing expertise. Let’s create a sub bass sound utilizing a processed sine wave pattern, after which layer it with a sub bass audio pattern for a thick-sounding low-end basis.Import a pattern into Huge X’s noise oscillator by clicking the drop-down menu subsequent to the Huge X emblem within the header part and clicking the Present Consumer Content material Folder. Choose Present Consumer Content material Folder, navigate to the folder, and replica a Sine wave pattern file into it.
Return to Huge X and, from the identical settings menu, choose Rescan Content material. Your pattern will now be obtainable within the Noise participant’s menu below the “Consumer” class.
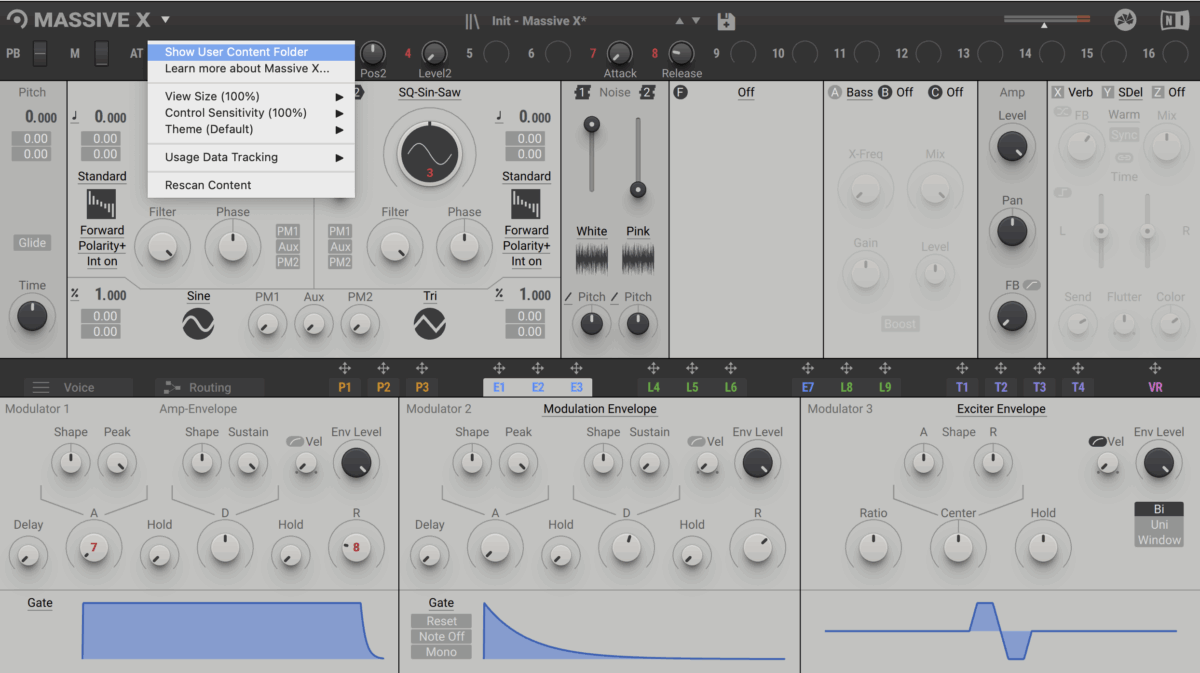
Within the Noisetable part, click on on Noisetable 1, Consumer, and choose your pattern. Alter the quantity of the noise that’s combined by adjusting the extent slider on Noisetable 1.

Activate the Filter part (situated to the correct of Noise) and choose the Asimov filter, a low-pass filter. Filter out the entire low finish beneath 200 Hz.
Within the Stereo Results sections (labelled with X, Y, and Z), activate X and choose Reverb. Flip the Dimension as much as 70%. Lastly, form the sine wave layer utilizing Huge X’s modulation part, barely growing the Decay to round 4.25 ms, and Launch to 10 s.

Create a clean MIDI clip, and add a MIDI be aware for every sub bass be aware. Be sure you be aware the unique key of your sub bass pattern.
Create an audio monitor, and add a sub bass pattern in the identical key as your MIDI sine wave layer. Alter the 2 samples in order that they begin and finish on the identical time. Group the 2 layers collectively and equalize them, utilizing a low-pass filter to chop off all of the frequencies above 200 Hz.
You possibly can bounce out the mixed bass monitor to a single audio file, and save this pattern to make use of as your new go-to low finish pattern.
As an alternative choice to this methodology, Huge X options insert oscillators that can be utilized so as to add a sub bass. So as to add a sine wave, navigate to the Insert FX slot 1, choose Insert Osc, and select sine wave.
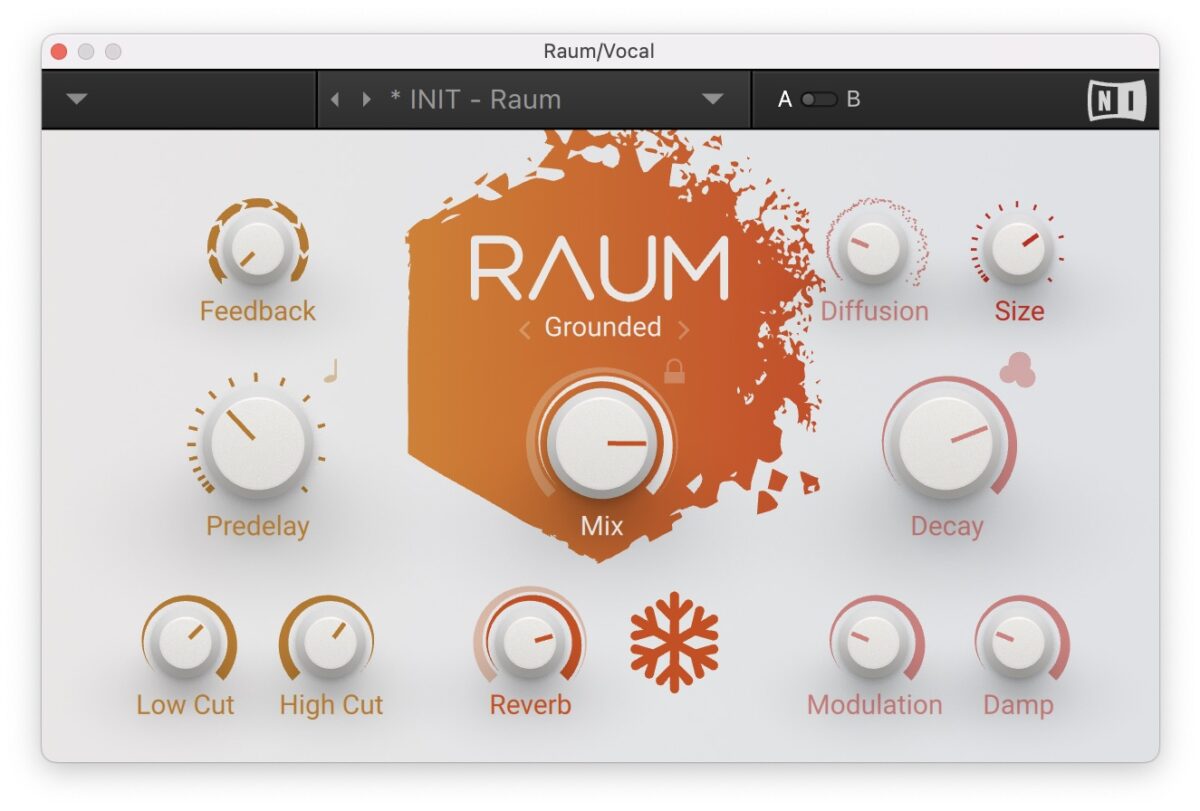
Create atmosphere utilizing Raum
Begin with a pattern in the important thing of your monitor. This could possibly be a vocal loop, a synth half, or a percussion loop. When you’re utilizing a vocal half, minimize the audio right down to your favorite part and replica and paste this part, repeating it in a constant sample for an eight-bar loop.
Add Raum onto the audio monitor, and select both Grounded or Ethereal mode, as these each have a Freeze perform. Set the Predelay to round 37 ms. Improve the Dimension and Decay time, and improve the Combine and Reverb quantity. Press the Snowflake button to freeze Raum. Lastly, alter the Low Minimize filter to style (the one on this instance is -16 dB) and the Excessive Minimize filter to round 10 kHz.
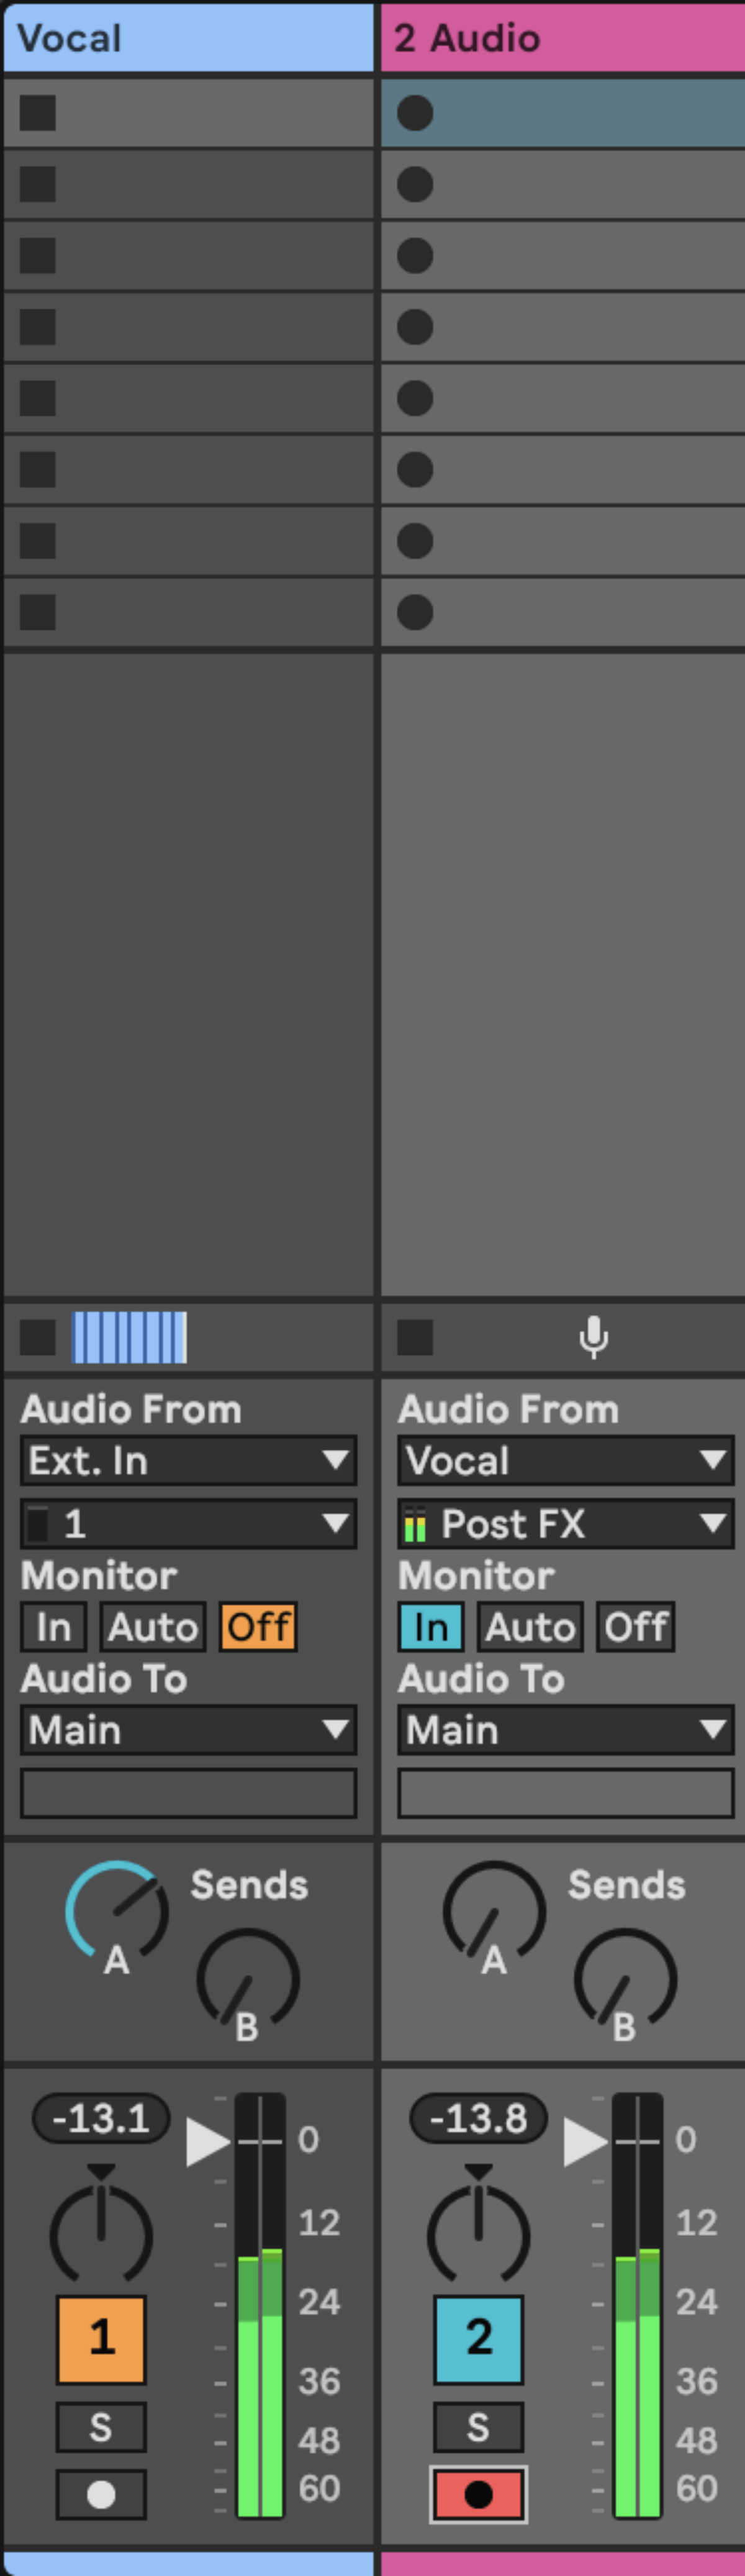
Create a brand new audio monitor, and route the audio from the monitor with Raum to the brand new monitor. Document the audio from the monitor with Raum to the brand new monitor.
To additional form the atmosphere, add an equalizer to the monitor, and use a low and high-pass filter to chop the high and low frequencies. Improve the stereo width of the atmosphere by including a stereo widening plugin like iZotope Imager. Right here’s the ultimate atmosphere sound.
Flip your personal samples at this time
Drawing inspiration from top-tier producers, the important thing to really distinctive sound design lies in transferring past pattern chopping. By leveraging the superior capabilities of the Native Devices 360 Plus suite, you may make use of artistic pattern flipping methods to essentially rework your audio sources.
These strategies utilizing NI instruments permit for the creation of unique sonic components, successfully turning samples into the distinctive sounds for professional-level monitor manufacturing. It’s time to start out reworking samples. Dive into 360 Plus instruments at this time and begin forging your personal unique sound.
The publish How one can flip samples like the highest 1% of producers first appeared on Native Devices Weblog.


